2.25.2018

Pinball Wizard!

I've had a bit of trouble getting back into my studio.  I thought the 'envelop' tutorial would ease me back, but, not so much....I have ventured into the room a few times but mostly I bounce around like a pinball and end up remembering some very important business, like unloading the dishwasher!!!!


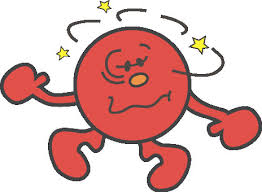
What I realized is, this pinballing feeling is actually a familiar state for me.  It usually shows up around the time that the seasons are going to change.  I'm over whatever I was thinking and planning for the current season, but not quite prepared for the next one.  It feels a bit early in Michigan to be thinking about spring and summer, but the fashion industry is already talking about next fall so I guess it's not to early to start piling up my linen projects!

In the spirit of more intentional sewing, I decided to 'watch myself' as I make the shift from winter to spring this year.  I know there must be a process, because it happens every year, so what is it? I think the "pinball feeling" is the initial step!

My brain has been busy collecting for awhile.  Images, colors, fabrics, techniques, patterns, ideas....all of this collecting is spinning around and creating that bouncing behavior.  I pick up a pattern, but am not sure what fabric I want...I find a cool shirt on Pinterest, but need to figure out the pattern, I read about a great technique in my Threads Magazine (wink, wink) and go trolling about for the right project...I'm like a dragonfly stopping for a few seconds here and there and then off on another mission.  So today I decided to look at my collection and see if there was enough stuff to start making a plan.

I have been aware that I'm being drawn to a little different color palette.  Of course, it's still very much in the 'mud colors' range, but I have noticed a pinkish-brownish-grayish color wiggling into the picture.  It's as good a place as any to start...


This color, which I'll call pinkish-gray for lack of a better name, started making an appearance in my yarn choices.  In December I started working on an alpaca cardigan (center) that was leaning in the pinkish-gray direction.  I carted a pile of linen and cotton yarns to Florida and back (left) but ended up working on a yarn that I picked up while I was there (right).


I also went to an artisans' fair while I was in Key West and bought a really cool eco-dyed linen dress...and guess what?....Yep, it's pretty much pinkish-gray. (there are a few blotches of gold, which come from tumeric!)


OK...a new color...


I next went hunting around in my closet to see if there were other hints of this color.  Obviously, it is not a total departure from my go-to palette and sure enough I came up with a cotton cardigan that I love but haven't really worn in awhile.  Excellent!

Let's take a wander in the ol' stash...

...a nice gray (with a hint of pink) stretch denim...a double sided gray/print ponte knit...how about something to give a bit of contrast...like a nice dark washed denim to round out the group.


I left that pile to marinade and moved on to another challenge that has been sitting on my table this fall and winter.

I have a gorgeous alpaca cardigan that keeps looking for an outfit.  Let's see...
I know that it is not hiding in my closet, been there, so how about the stash?  I'm liking the brown wool jersey, it has a hint of green that really blends with the heather of the sweater.

AND it looks fab with the tweed sweater I knitted last fall!  How about a gray (greenish) stretch twill, a cool novelty knit with velvet stripes and maybe that dark washed denim from the first pile ...


Whew! That's starting to feel like a couple of piles of potential....how about some pattern ideas...I hauled out the clipping file.  This is a folder that collects pictures, little sketches, catalog pages, etc. that catch my eye.  I started looking for themes...it appears that I am wanting a denim style dress (maybe that's the reason the dark denim ended up in the fabric pile?)...


...and there is also a group of tops that are conspiring...hmmm?


...how about the yarn stash...any potential there...????


The pinball feeling is starting to dwindle...I'm feeling the stirrings of a real plan...on to the pattern stash...


I think the wool jersey and the double faced ponte would be great dresses, and the cardigan needs a short waisted style....where's my journal...?


So THAT'S how I do it!  From pinball to plan!  
The collecting is fun and necessary, but working the ideas into a plan helps me focus and actually get to making stuff.  Of course you will notice that I always work in pencil!  There will be significant edits, about faces, total deletions and curveballs before the end of the season.  But, for now, I can head into my studio and instead of bouncing I can start pouncing (sorry, I couldn't help it)...😝


2.16.2018

Earring Envelope: A Tutorial I think!

It has been quite awhile since the request for instructions for my "Earring Envelope" was made.  I apologize for the wait and hope this post isn't totally confusing.  I realized as I was putting the sample together that there are some steps that might be better understood in person!  We'll see how this goes and of course ask any questions that will help clarify things....

I tried to choose fabrics with good contrast so you will be able to see the steps.  I haven't been in my studio since I got back from my Florida trip, so this was a nice 're-entry' project.   Thanks for askin'!


What you will need

3 coordinating fabrics. I used cotton quilting type fabric, they press well and have enough body to hold the shapes.  The biggest piece is about 11" X 9" so this is a great project for those little scraps that we all seem to collect.

3" X 9" (approximate) light weight fusible batting

4" piece of ribbon

The pattern is my own and I hope you can see the measurements.  When it's flat the folding lines are a bit hard to figure out.  It gets clearer as you start making the folds.  (I hope!) The tricky part is making the inside pockets.  It's done by making a fabric tube and folding it into a series of pockets.


Pattern Piece 1: Pocket Insert


Pattern Piece 2: Outside and lining


Cut one piece for the inside pockets using Pattern Piece 1.

Cut one piece for the outside of the envelop, and another for the lining using Pattern Piece 2.

Cut the fusible batting 1/8" smaller on all sides using Pattern Piece 2.

Cut a piece of ribbon 4"


Sew a 1/4" seam matching the short sides
(8 3/4")of the pocket insert piece, press the seam open, turn the seam to the inside of the tube and then press the fabric tube flat, positioning the seam in the center.  

This piece will be folded to make the series of pockets.


The first 2 folds are made with the seam facing away from you, 1 3/4" from each raw edge.


Turn the piece over so the seam is facing you to make the second 2 folds.


Make the second folds 1 1/4" from the first folds, fold in the opposite direction.


You will end up with an accordion looking series of folds.


Match the first set of folds and stitch them together.

Flatten along the fold lines and press.  

This is the pocket insert.


Position the pocket insert on the right side of the lining piece 1/4" from one of the short edges.  Match the raw edges of the pocket insert with the long edges of the lining.  Stitch the insert to the lining through the mid point.  


Fuse the batting to the wrong side of the outside piece.  Position the ribbon 3/4" down from one of the short edges of the outside piece on the right side. 


With the batting facing up, place the outside piece on top of the lining and pocket insert assembly, sandwiching the pocket insert between the outside piece and the lining piece.  The ribbon should be facing the pockets at the same end.  

Stitch the pieces together with a 1/4" seam making sure to catch the raw edges of the pocket insert in the long seams and being careful NOT to catch the pockets along the short seam. Clip the corners.

Leave the short end opposite the ribbon end open for turning.


Turn to the outside and press all seamed edges well.


Fold in half lengthwise with the lining to the inside of the fold.  Stitch across the end using a 1/4" seam allowance.  Trim the outside fabric and the batting close to the seam. Trim lining corner at the folded edge.


If you have a point pressing tool, this is a good place to use it!

Press the seam open forming a point.  

Turn the point to the right side and press again making a clean point and centering the seam.


Topstitch the point on all three edges to secure it.


Slip stitch the inside most pockets together along the outside edges to form a center pocket.  There should be 5 pockets in all.


Fold the point over the pockets and through the ribbon to secure.  Press one last time.


Load your envelope up with earrings and other jewelry and away you go!