
For a Hale Bob fabric it is quite tame. Most of the line is very wild. Lots of bright colors, large prints, big borders...very distinctive. But I liked the softness of the gray and beige, definitely in my palette.
The piece was a purchase last spring and has been marinating since then. It was the last piece and may have been a 'second' since the print is not actually centered on the fabric. I guess I just like a challenge!
The piece is 52" wide and 42" long. Not a lot of wiggle room!


Here are some examples of the kind of things that Hale Bob does with the prints. The one on the left is actually my panel! Obviously I couldn't get a long dress from a single panel, but I figured that I could get a tunic-y top thing if I really planned and cut carefully.
I started working on a top idea that had a round close fitting yoke with a gathered, peasant style body. I fussed and tweaked and got something that I liked, and that fit, and that I knew I would NEVER wear! I am broad across the shoulders and chest and emphasizing that area just doesn't work for me. So back to the drawing board.


I knew I would have to be careful about where the print ended up. I draped my dress form with several possible placement ideas...
The obvious "center placement"

...which put the beige medallions in a very awkward place on the back...NO!

Several other configurations....


Part of the difficulty was that I wanted sleeves, which meant very strategic cutting.
I settled on a version that put the main design near the neckline and allowed for sleeves to be cut with the boarder print at the hem.

I was really nervous about cutting into the fabric, but I had a plan. I cut the front and liked it, I laid out the back and was careful to match the border at the side seams...I cut them...and...
Oh yeah...I had lengthened the hem on the front and forgotten to do the same with the back pattern piece!!!!! What do they say about 'the best laid plans.'?

I was actually surprisingly calm about the whole thing...I recut the neckline on the front and at the end of the day it was just right for the length of the finished tunic. Sometimes we get lucky!

It also meant that I had a 'neckline' to play with and make samples of neckline finishes! Bonus!
...and here's what was left....

One of the tricks that I use when working with 'swishy,' 'squirmy' fabrics is something I picked up from a Sewing Workshop pattern years ago. The pattern instructions suggested using 'tag board' to help press edges and hems. It is really a great technique. I made myself a template that I can use for all different hem widths.
Each side of the square tag board has two different widths...
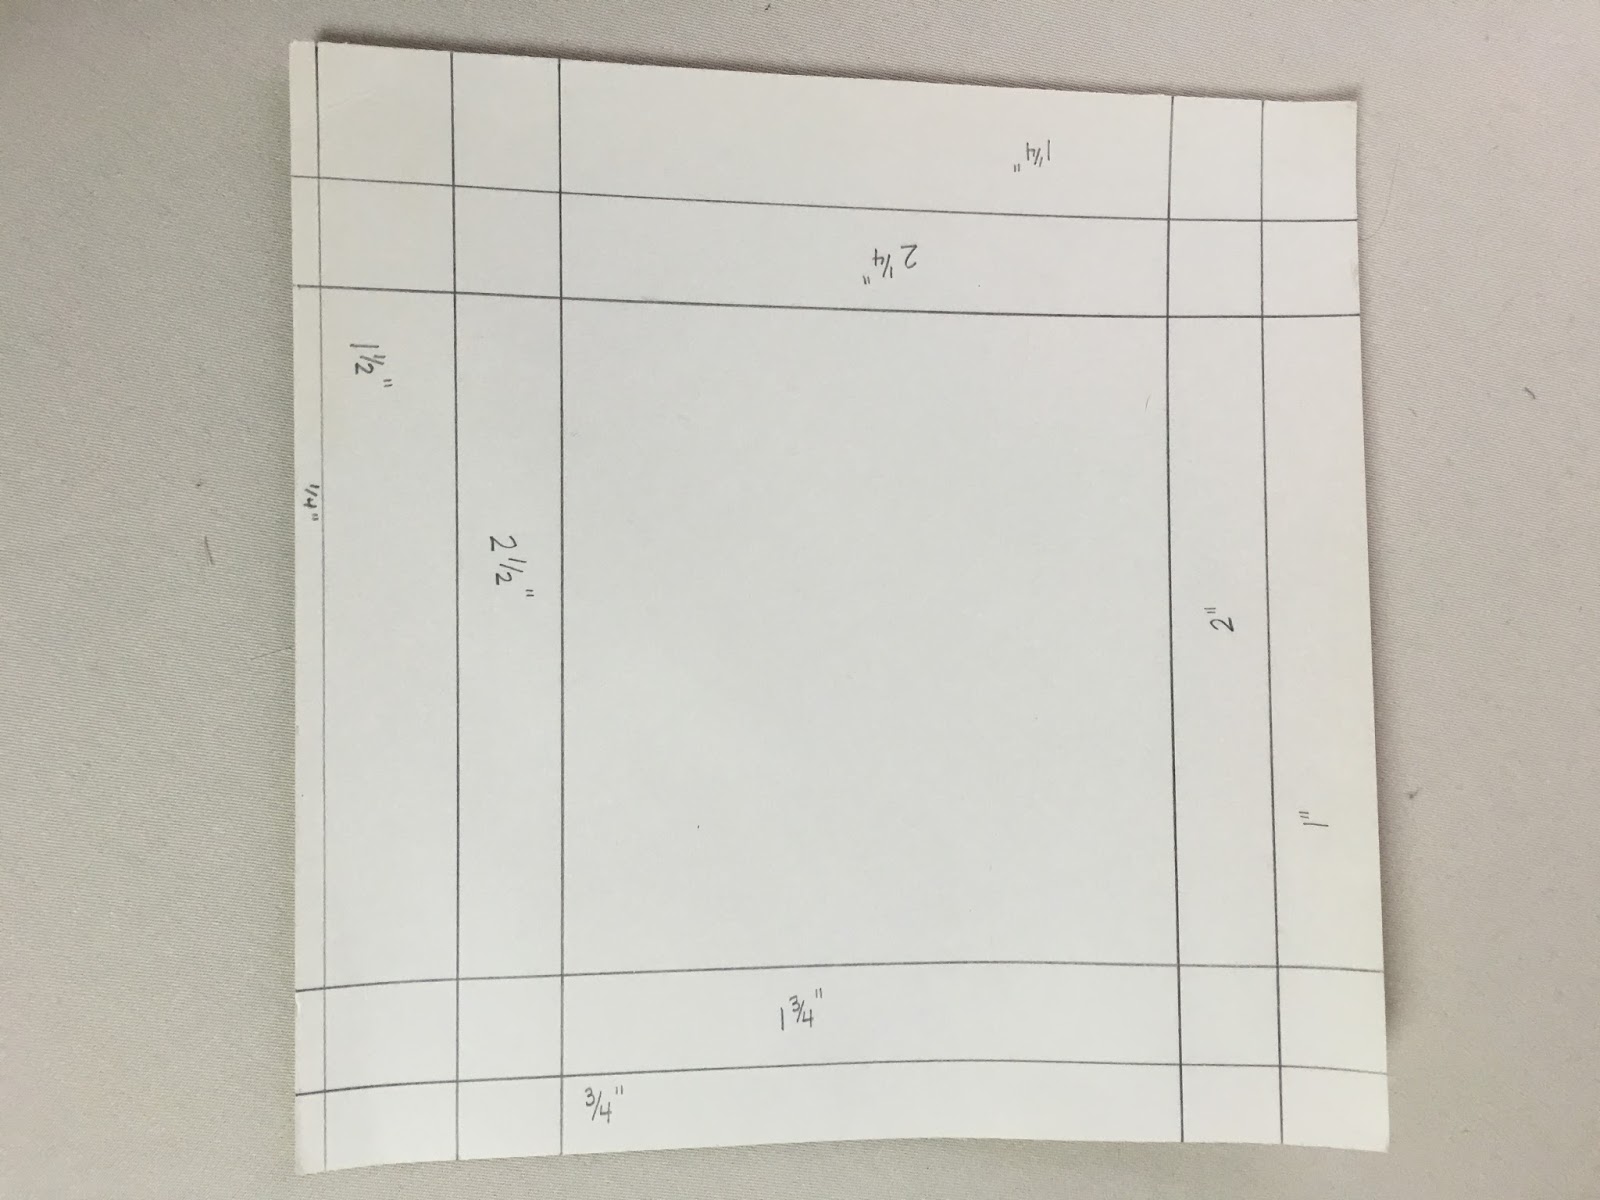


I can fold the edge of the fabric to whatever line I need and press against the firm edge of the tag board for a really crisp fold. Thank you Sewing Workshop for the great tip!
So here, after much fussing is my finished Hale Bob shirt. It's a pretty simple style, but something I know I will wear.


While I was trying out different possibilities, I liked the ones that had a cowl type drape at the neck. I couldn't figure out how to get a true cowl neckline with my limited fabric, so I used a few of my scraps and added some extra fabrics to make this infinity scarf...I may not wear them together, but I like the scarf too! Hale Bob...Hale Yeah!

Your careful cutting has produced a lovely top - well done!
ReplyDeletethanks so much! I did get to 'carefully cut' twice! ;)
DeleteAll the iterations are interesting. The final top is lovely as is the infinity scarf.
ReplyDeleteWhen you only get to see the end result you miss the part I like best...the process!
ReplyDeleteI agree totally.
Delete