
I knew I would have my annual 'vest-a-thon' for my son's birthday waiting for me. It has been fun to have him pick out fabric combinations and make something that I know he will like. Now that I have made a few versions, the pattern is getting pretty close. Each round we have tweaked it a bit so that it fits the way he likes. He has also figured out which fabrics he likes best for the different elements...no slippery linings, fun prints for the backs, a little surprise for the linings...and he is very appreciative. (what a good boy!)
The other project that was waiting for me was major surgery on a beloved jean jacket that my son's girlfriend has had since she was in high school. Yikes! I really didn't want to mess up on that one!


I got it at the end of the year and stared at it for several weeks. It stared back. It was very intimidating. I decided it deserved some solid thinking time, so I put it on my dress form and started thinking...and thinking...and...enough already...Just do it!

My first idea was to scavenge parts from another jacket to replace the worn out bits. I found a jacket and some jeans at the thrift store that could act as my 'parts department.' I realized that the thicknesses of the denims would be really difficult to sew and probably uncomfortable to wear. And it was obvious that this jacket was all about comfort! OK, scrap that idea.
My next thought was to make new parts. Fine, but that opened up a huge range of options. I put together a few combinations and texted off pictures hoping to get one blessed by the owner before charging in.


While I liked them all, I was partial to the paisley golden brown combo and was very excited when that one came back as the winner!
I wanted to leave as much of the original jacket intact as possible, strengthen the areas that were most worn and replace the missing parts. Here's what I did...


I fixed the hole and fraying on the yoke and put a lining on the inside to give it strength.
I bound the worn out collar edge. I bound or satin stitched over the frayed edges of the pockets, front openings and button holes. Patched any 'major' holes. And finally, I added new cuffs.


I took a few 'progress photos' to describe a trick for getting nice square corners when turning out collars or cuffs.

Instead of trying to hit the corner and pivoting the stitching, I sew off each edge which insures that the corner ends up square and even. Trimming on a 45 degree angle close to the corner reduces bulk and supports the corner when the cuff is turned out.

Get yourself a point pressing tool, you will love it! Pressing the seams before turning out the cuff keeps them from bunching up and gives a nice crisp edge.
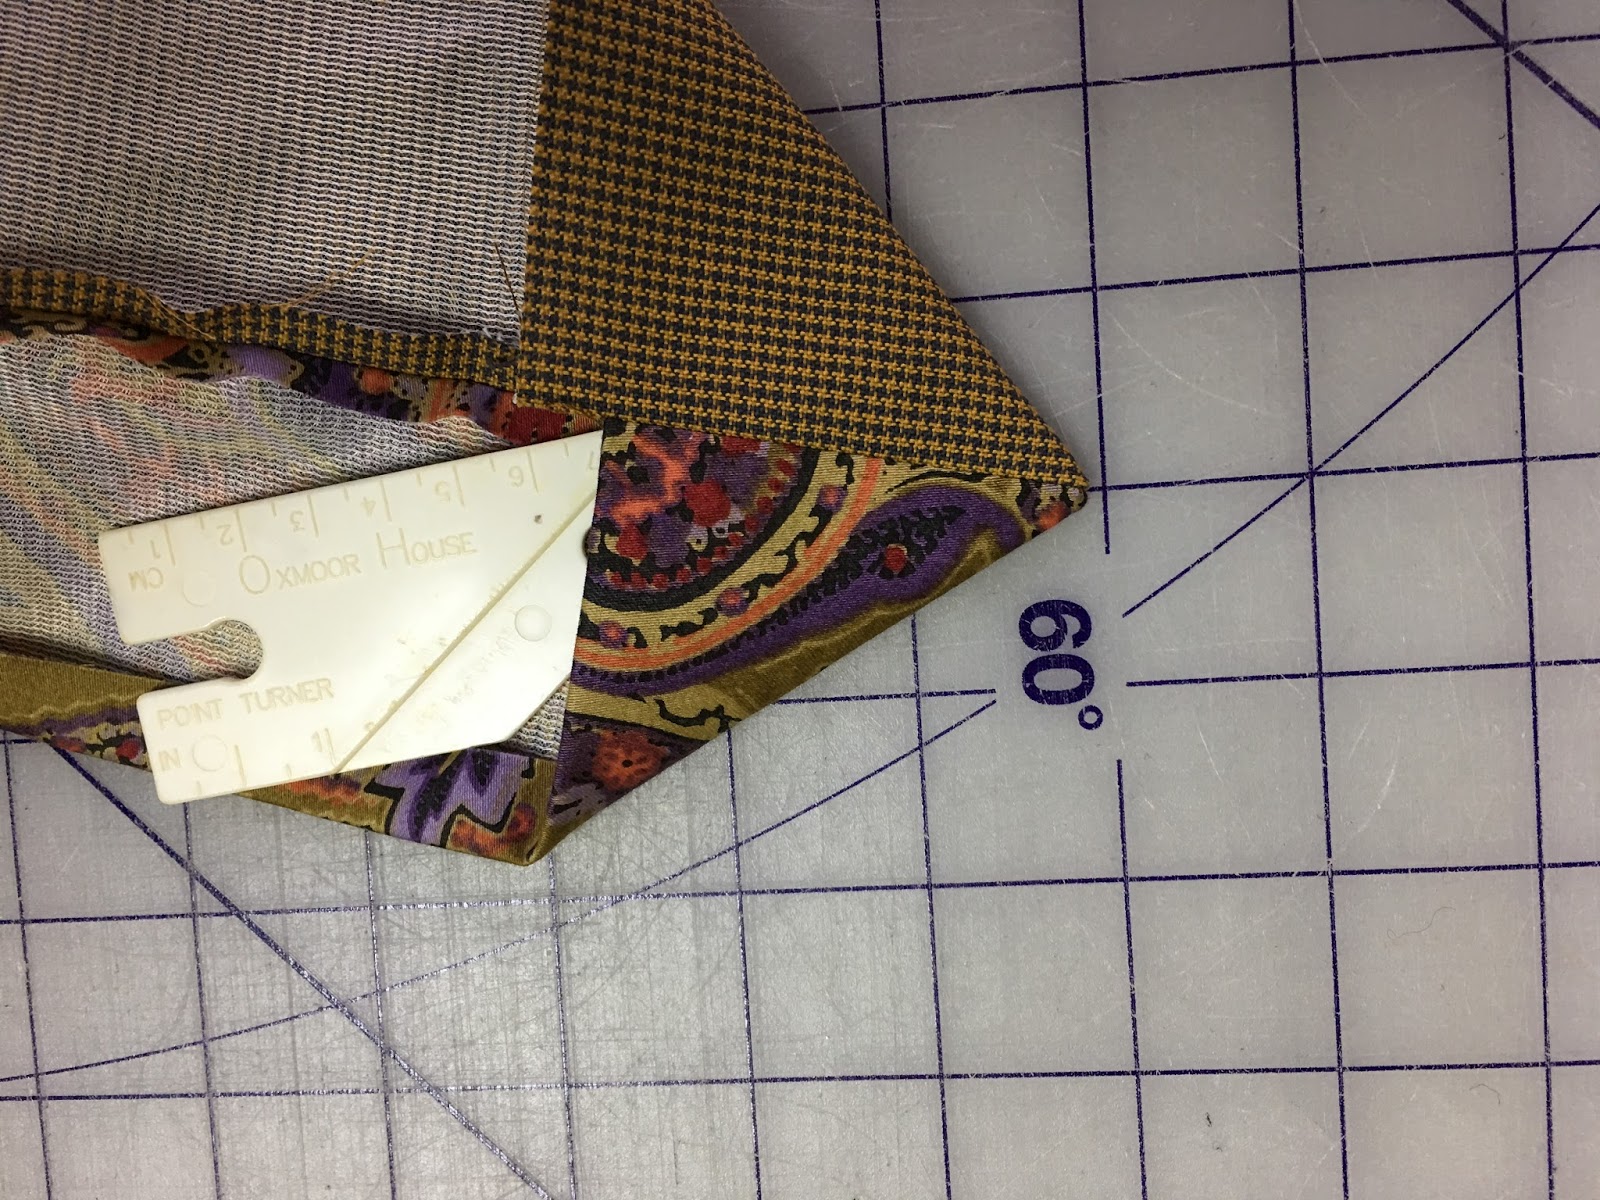

Nice square corners!
I am quite relieved that the renovated jacket has been given the 'seal of approval' by the owner and is safely back in her closet. I think the 're-tread' will give it a few more years...but I'm keeping the scraps just in case!
Wow! This is really a Boro jacket. She/you could keep this going for years to come. I hope she realizes all the thought and love that went into this renovation. Stunning.
ReplyDeleteAnd thanks for the tip about getting nice sharp collar points – they can be pesky little devils and if they don't match and if they aren't sharp they can really bring a garment down.
Lumpy, bumpy cuffs and collars can really scream, "I made this!" Glad the tip was helpful.
DeleteOH, so nicely done!! I so enjoy your sharing of ideas and process.
ReplyDeleteSince I don't really 'need' anything new to wear these days, it's all about the process for me...I enjoy it too!
DeleteWhat an excellent jacket refurbish! I'm afraid I would have thrown my hands up in despair.
ReplyDeleteI did have to take some deep breaths before cutting into it! And big signs of relief when I finished!
Delete