Showing posts with label Pockets. Show all posts

6.26.2021

A New Baby (Lock)

This is a quick round up of a few random projects that I used to christen my new sewing machine!  Yeah!

I have had a Brother sewing machine at our lake house for 12 years.  Because I never did much sewing here it was fine.  But as I started using it with more substantial projects in mind, it just wasn't up to the job.  Last fall I had considered a new machine for Florida, but ended up taking my Janome to have there.  While I was shopping around I realized that I have had 4 different machines over the years with the whole shebang!  Monster embroidery units that I have never even taken out of their boxes!!!!!  I didn't want to do that again.  

My advise to people when they ask me what machine they should buy is always to get what you need and a smidge more to grow into.  Know the dealer.  And know where you will have it serviced.  I finally took my own advice!  I got a really lovely Baby Lock machine...sans embroidery, from the local dealer who has a service department right here!  Isn't she a beaut!


So far I am really, really pleased with my choice.  (Can you see me taking the picture in the side panel😜?)  I have had two different Baby Lock sergers that I have loved so I didn't go in completely blind.  It is very intuitive for the way I sew, so it has been a very smooth transition.  The dealer does have owner classes that I will definitely take to get the bells and whistles figured out.  But the basics have been easy to get used to.  So what have I been practicing on...?

I had a linen bias cut dress that I liked but didn't really wear.  I scrutinized it and realized that the fabric is a bit heavy, it is a decorator print, and the sleeves were just not right.  I decided I could take them out and make the dress cooler to wear and eliminate the whole sleeve issue!  

When I looked at this picture I was horrified!!!  Had I really worn this out in public!?!  The big brown leaf with the spot in the middle in exactly the WRONG place....OMG!  I was about to scrap the whole thing!!!  When I calmed down I realized that my dress form is a bit 'perkier' than I am at this point so when I put the dress on it wasn't as much of an issue.  Whew!


I took the sleeves off...and added a bit of elastic to the back waist seam to pull it in a bit, which gives it a little more definition at the waist.  Much better.  I'm much happier with the dress and think it will come out of the closet this summer, finally.


The second project I tackled was another pair of Merchant and Mills Eve pants.  I love this pattern!  I made them in a mid weight army green linen.  I love linen!  What can I say...they are great!


I do make one major modification to the pattern when I make it...it doesn't have pockets!  What!?  Right?!  So I incorporate slant pockets and hide the opening in the left hand pocket bag.  The original pattern calls for a side seam zipper, but because the opening is hidden in the pocket, I don't even bother with a zipper.  The button at the waistband moves forward a bit and I like making it a bit of a feature.

...And the last little project in this round up is a patchy linen top.  I did mention that I love linen didn't I?
and, yes, I had all these bits and bobs of linen scraps in my stash!  I lined it with a very soft Liberty of London lawn so it is still very light weight.  


...and I love my new buttonhole foot!

Now that I have eased into a few simple projects, I will see if I can get out of second gear over the next month and try out some of the other features of my new Baby...Baby Lock!

4.10.2021

Hello Lounge Lizard!

 I finally succumbed!  I have been trying desperately to hold onto some semblance of publicly acceptable clothing, maybe thinking that I might suddenly need to go somewhere!? πŸ˜† But when I saw the latest pattern introduction from Closet Core I dove straight into the "loungewear" pool.  Who was I kidding anyway!  I have been wearing the same yoga pants and tank top  everyday and frankly, could use some newer, nicer versions.  So when I saw they were available, AND in a sale bundle, I ordered them up!  I had also ordered a few yards of a really nice light weight fleece from Emma One Sock a few weeks ago with nothing planned for it, and thought it would be perfect for the hoodie and joggers.  (Joggers is the new name for what I wore in high school and called "sweatpants," much cuter name and allows an old lady to feel cool and with it! or 'dope'?!)


Since most patterns that I have used need quite a bit of manipulating to get the fit right for my body, my usual first step is to make a 'trial balloon' hoping it will be a wearable muslin.  More often it becomes a chopped up mess of alterations.  I didn't have another piece of fleece to play around with so I decided I would just go for it and if I needed to get more fabric, well, I knew where it had come from!  

I checked out the pattern measurements and figured I would make a size 10 for the joggers and, because the sweatshirt was pretty generously sized, a size 8 for the top.  I did add my normal 3" to the length of the sleeves and the pants, but other than that I cut them straight out of the envelop, with my fingers tightly crossed.  

I realized as I was laying out the pattern pieces that, if I was very miserly, I might just be able to get the shorts cut out as well.  Challenge accepted!  I think I spent longer wiggling pieces around than I did sewing them up!  But, with a few other adjustments, I managed to get the hoodie, the joggers AND the shorts!  How...?

I had already decided I wanted to add a ribbing to the edge of the hood.  The pattern suggests turning the edge under, but I thought a ribbing would give it a bit of tension to keep it from falling too open.  I was thinking I would just use a strip of the fleece, but now that I was in conservation mode, I went looking around for something else to use.  The only thing I had on hand was a slate gray knit, but it looked great with the fleece.  Once I introduced the second fabric I used it for the waistband of the shorts and trimmed the pockets of the hoodie and the shorts so it became a "design detail." (if you do something 3 times it's a design detail not a mistake!)  I also cut the pocket bags out of a light weight linen.  It actually worked really well.  It reduced the bulk of the pockets and stabilized them at the same time.  I reduced the pocket bulk some more on the shorts  by only making the back pocket bag and stitching it through the outside of the fronts.  And finally, I ended up piecing the back yoke of the hoodie.  I knew I would have to piece somewhere and figured the yoke would be under the hood most of the time.  I lined the yoke with a piece of an old T-shirt to keep all the seams from being too irritating across my shoulders.  As I was panning and making all these fussy maneuvers I kept thinking, "this is a lot of work for something that might end up a chopped up mess!"  


The piecing on the yoke is hard to see from the outside, which was kind of the point!


Well, you can see by the lack of in-progress pictures that I got carried away...again...and forgot to take one photo.  But, I did manage a few of the completed garments, which worked out to be amazing!  I am more than pleased and surprised at how well they fit and look.  I didn't even have to adjust the crotch curve!!!


Whoa!  Where'd those crazy yellow duck shoes come from?!

Now I am wondering why it took me so long to embrace the loungewear trend...but I think there will be more lounge lizarding in my future.   And some more Closet Core patterns as well. πŸ˜‰


4.04.2021

A Tisket a Tasket an Egg Collecting Basket!

It's Easter and I made an egg basket!  Well, I made an egg basket and then Easter happened.  The two events only coincided  accidentally.

Here's the deal...my son and his girlfriend have a flock.  Of chickens!  And they lay lots of eggs that need to be collected. (the chickens, not my son and his GF.)   "Girlfriend's" birthday is at the end of March.  I always struggle with what to do for GF's.  I love them, but they are not easy to gift.  I worry about being too personal, or not personal enough, or too old fashion...anyway, this year I think I nailed it!  

The flock is an important aspect of their lives and I thought something to help with them would be enjoyed and useful.  I have seen wire egg baskets and thought I could come up with a fabric version that would do.  I did get side track by considering an egg gathering apron.  I saw a little girl with an apron with a bunch of pockets across the front and that seemed like a good solution until I realized that you have to transfer the eggs out of the pockets before taking off the apron.  That means you actually have to 'collect' the eggs twice!  Not very efficient.  So back to the basket...

I figured the pockets were a good idea to keep the eggs from bumping into each other, but what size?  I got out some dish towels and eggs and started to engineer my basket... don't they look cozy?


Once I had the pocket size I created a "pattern" that would have an inner and an outer circle of 6 pockets in each circle.  There is also space in the middle of the pocket circles in case the flock is extra productive!

My next stop was my neighborhood fabric store...I love that!  I collected some too cute chicken fabric, some plastic canvas stuff and strapping.  I had some quilt batting in the cupboard.  I wasn't exactly sure what I might need, but I figured there was an egg basket in there somewhere.


I got very caught up in the process, as I often do when engineering a bag, and forgot to take any pictures.  Suffice it to say, that there was a fair amount of growling and gnashing of teeth before the final version emerged..

I put the canvas in the outer circle and batting in the inner one.  The stiffness helped keep the pockets from collapsing into each other and the batting pads the eggs so they stay intact.

I am very pleased with the end product and have heard from the "flock-keepers" that it works really well.  I hope there won't be requests for another one, because I have no idea how to do it again!  This is definitely a "one-of-a-kind" egg basket!


3.08.2021

Gone Fishin'

 I am quite excited about my white shirt challenge, which is basically an excuse to order up a whole bunch of white fabrics.  I find a lot of inspiration from actually holding and draping the fabric, so until my box-o-yardage arrives I will have to find other projects to keep me entertained.  

When I was at my fabric store hunting up stuff for my first white shirt, I couldn't resist a cotton print that was perfect with a piece of batik that I had hauled with me from Michigan.  I also found a really soft dark chambray that had to go into the backpack as well.  I was on a roll after my shirt so I pulled them out.  I can't remember where or when the fish fabric came into my stash, but it seemed like a good one for KW.  When I saw the greenish one with "water drops" on it, I thought it was meant to be.

I only had a 1/2 yard of the batik and the same of the water drop print, so I needed to pick something that wouldn't need much fabric.  I have been wearing an Ethel Designer Top (Style Arc Patterns) a lot since we got to Key West and the design lines are perfect for mixing and matching.


It's a pretty straight forward project, figuring out which fabric to put where took longer than actually sewing it together!  I  used the selvedge of the water drop fabric to accent the triangle piece of linen at the neckline.  The batik is a really nice weight for this top, the cotton is a bit heavy but I think it will be OK.  Note to self, choose very soft, drapy stuff for the next one.

I didn't have much in the way of scraps when I was finished.  Pretty close to a zero waste project!


When I washed the chambray it turned out really soft, but felt more like shorts than a shirt.  I can't remember the last time I have had a pair of 'denim shorts' ....

I started with my PJ bottom pattern.  The softness of the fabric meant that an elastic waist wouldn't be too bulky, not the usual case with denim shorts.  I made some fun pockets, which are impossible to take photos of...trust me they are adorable!  Back pockets...

Front pockets...


Another pretty straight forward project, although I did struggle to get the length right.  My husband kept rejecting them as "too long."  (He's admittedly a leg man 😏)  I did want a pair of 'shorts' after all.


...And they look great with my fish shirt!  Score!


Now I just relax until my white fabric shows up!

3.02.2021

A Little Challenge for 2021

 2021 has been looking suspiciously like 2020.  The main similarity being the inability to plan anything!  I do realize that there are yogis out there who spend their whole lives trying to be present in the moment, but the present moment does not inspire me right now!  I need a heading, something to point my compass at....nothing monumental or earth shaking, just a little something out there in the wilderness to make my way toward.  Since traveling is still a big unknown it can't be an anticipated vacation, or visits with friends and family.  After considering a few options I landed on a sewing challenge.  What and when I sew is pretty much in my control and that is what I need, something that doesn't depend on "acts of God" or the whims of politicians.   I have been having a bit of trouble getting my 'sewjo' going and thought some kind of challenge for myself would get me moving and keep me going.  

I thought about joining in on the "make nine" challenge that many people do, but it requires that you choose nine patterns and nine fabrics that you want to make over the year.  This is just not possible for my brain.  I never really know what I will be sewing until I'm doing it.  The idea of choosing NOW what I want to be sewing in September?...I don't see it.  

I have a sewing buddy who got herself a whole bolt of white linen.  She wants to make a pile of white shirts.  Ever since she mentioned this it has been rolling around in my head.  I decide I would do a 'white shirt' challenge this year.  I made a few last summer and it was fun and challenging to make each one it's own thing.  I love playing with different textures and weights of fabric, the style possibilities go on and on, and choosing white fabric on line is much more doable than trying to match colors!  I am targeting one shirt a month...doable but not strict...I'm not going to beat myself up if I don't get 12 in the year.  In fact, since this is March already I only have 10 months left anyway! 

This idea took shape during the last week of February.  If I was going to start in February it was going to have to happen right away.  C'mon sewjo don't fail me now.  Not at the starting line!  I masked up and made a quick trip to my corner (literally on the same street) fabric store and came up with a white canvas duck cloth.  ...I said it was going to be a challenge!  I also found some metal buttons and twill tape, here we go.  Talk about staring at a blank canvas...😏


The weight of the fabric suggested a shirt-jacket of some kind.  I pulled out my Tabula Rasa pattern as a starting point.  I love the sleeve of this pattern and it would work well with my canvas.  Topstitching also came into the plan...back to the corner for heavy duty thread.

One of the things I really like about the Tabula Rasa is the sewing order.  I like getting the collar and front details finished before adding the bulk of sleeves to the mix.  


The metal buttons had little slots that I threaded the twill tape through.  I stitched the tape to the center front between the buttons.  I got all six buttonholes perfect in the first go!!!  Too bad they were all 1/2" to low for the buttons!!!!  Argggggggg.  The sound one makes when ripping out five perfect buttonholes!  

Once the fronts, back and collar are ready, the sleeves and side panels are connected and the seam is done in one pass from the front hem over the shoulder to the back hem.  No fussing around in little confined arm holes.  This construction method is also great for adding topstitching details.


I added some extra topstitching to define the pocket....(hard to see it with all the white!)


So there you have it, the first of my white shirts (I'll have to come up with a catchy name for my challenge, maybe for March.)  A white canvas shirt-jacket.  I think it will be perfect for breezy evening walks to the beach.  


I'm not sure if it will continue the rest of the year, but having this little challenge got me motivated and sewing in the last week of February.  I'm already ruminating about the March shirt.  We'll call it a good start!

11.16.2020

A Fun Challenge in a Year of Challenges

 I have been waiting all summer to share this...with everything that has happened this year, I had almost forgotten that I had done it. 

Last February the Editors at Threads Magazine proposed a challenge to the 3 Digital Ambassadors.  Start with a men's suit and transform it into a new garment or ensemble.  With the gauntlet thrown, we got to work.  You can see the resulting transformations on theThreads website HERE.

I did a post describing the transformation that I did on the Threads site, so I won't rehash it here.  It was really fun once I finally got an idea that I liked.  It really was a challenge to come up with something a bit different.  At the end of the day, I was very pleased with my efforts.

Looking back with the perspective of the last several months makes it all the more challenging.  We returned from a visit with our son in London on March 10.  On March 11 we did a big shop with the idea that we should probably self isolate since we had been traveling through several airports.  Our plan was to do our 2 weeks and then back to normal!  Oh, how innocent that seems now.  

On the way home from the grocery store I remembered that I needed to get a suit for the Threads challenge.  We made a quick stop at a church thrift shop and bought the one suit that was on the rack, never thinking that it would be the last time I would be in an actual 'shop' for the rest of the year!  

Here are a few pics of the garments that I ended up making.  My idea came from my old gardening overalls. You can read all the gory details in the Threads article.  And they took some much nicer photos that you can also peruse.  They are having readers vote for their favorite transformation, so if you like my idea, give me a vote!  You will also be entered into a drawing for some pretty swell prizes.  


My idea was to make a pair of "business" overalls....


I started with a mock up of the bib part, from there I made a pattern and used different parts of the jacket to add the front, back and straps to my overalls....


The jacket got more and more tattered as I scavenged bits and pieces...


You can't have overalls without a hammer loop!


The lapels were the last bits I salvaged....rather than remake new pieces, I tried to use the suit details in tact but in new ways...


I added the lapels to a piece of fabric from my stash to make a cropped jacket to go with my overalls...


I think they are pretty classy...and kind of silly as well...


I do love that hammer loop!

It all seems like a lifetime ago.  2020 keeps challenging us over and over again...what I wouldn't give for an "easy" garment redo!  I hope our little exercise in recycling adds a bit of fun to your quarantine!  
Who knew?!


10.21.2020

Win-win...but not Winter!

I love fall!  I love the cool, crisp air.  I love watching the colors move through their journey from green to yellow and gold, to crimson and rust.  I love the soups and spices that happen this time of year.  The only part that I don't love is knowing that for the next several months I will be battling icy sidewalks, snowdrifts, power outages and arctic windchills.  I know some people love the snow, but as my healing time has lengthened, I am much more worried about tumbling than I used to be.  Cold and snow are parts of the Michigan seasons that I will be glad to watch from a distance.  But for now, I am loving the weather!

Having lived with four seasons all my life, I can't quite wrap my little brain around 'no cold.'  I have been making a new summer wardrobe to have in my new place, but this time of year I am just itching to break out the wool!  To quell the urge I hauled out a cotton jersey that has a mock quilting pattern.  It's kind of a mateliasse kind of thing.  It looks warmer than it is.  I thought it would make a great sweatshirt for the few cool nights that might crop up.  But I didn't want a plain 'ol sweatshirt...I wanted a more 'designery' sweatshirt.  I did some trolling around on Pinterest (you can see some of my finds to the right ->) to see what kind of details might up the cache of my sweatshirt.


I settled on a cropped style with some kind of gathered hem.  As a starting point, I pulled out my tried and true Tabula Rasa pattern.  As I have said before, it seems to cover a huge range of styles and I know it will fit the way I like when I'm finished.  I cut out the main pieces and left them long while I pondered how to finish the hem.  This is just the kind of project I love.  No definite plan, just a sketchy idea and a few detail options to get me going.  I can always hear Diane Ericson in my head, "do the part you know!"

This is also the kind of project that I get caught up in and forget about taking photos of the process.  Ooops! 

I wanted those Kangaroo pouchy front pockets that you get on sweatshirts, but a bit more 'elegant.'  (If "elegant" is a word that you can use to describe a sweatshirt?!)  Tabula Rasa side seams are the perfect place to set in pockets and I decided to line the shirt with a very light weight bamboo knit which meant I could use it for the inside of my pockets by just stitching through from the front.  The seams of the pattern are forward from the actual side of the body so the pocket placement is really ideal for getting your hands in and out easily.


I used the side panel underarm seam as my guide and extended my topstitching to complete the pocket bag.  A little hard to see with all the quilting lines...


I cropped the front and let the back hem hang a bit longer and used the hem allowance to make a casing for a half drawstring across the front.  Again the side seam placement meant the detail was a bit forward which I like.


Serendipity prevailed again when I realized that I could leave the sleeve length and use the lining to make  cuffs.  I love extra long sleeves on cool morning walks to keep my fingers warm!  

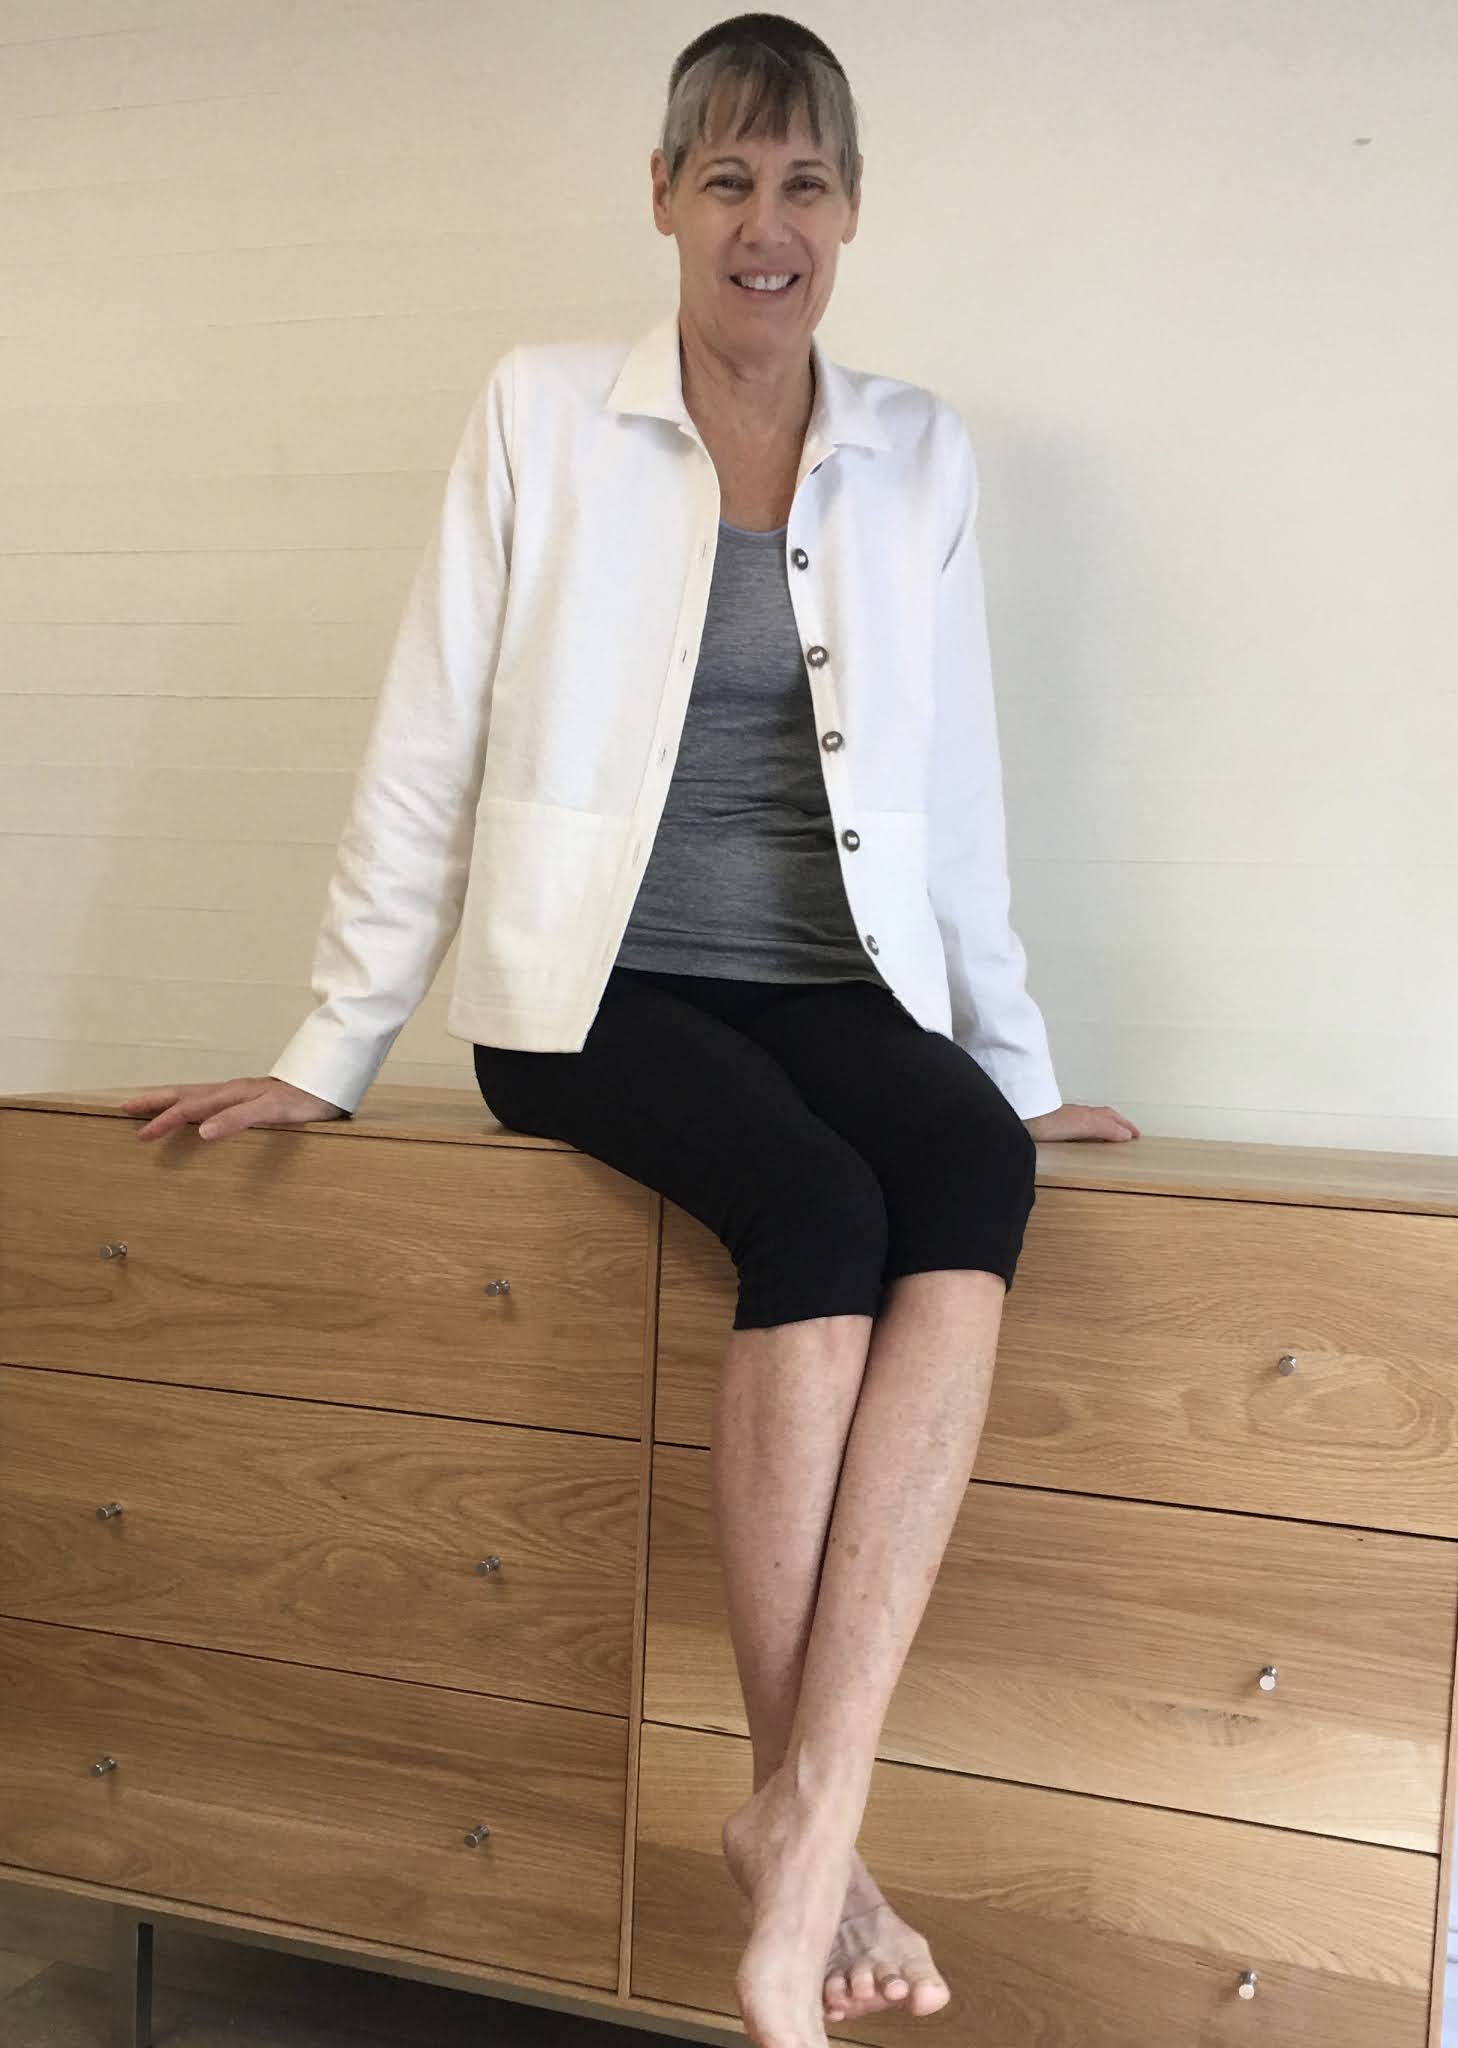
One thought that I played with was putting a drawstring at the neck as well.  I made a casing by wrapping a strip of the lining fabric over the neck edge and leaving a 2" space at the center front.  When I got the drawstring in place it was just one thing too many, so I took it out.  When I showed my astute husband my new sweatshirt outfit his comment was, "the neck doesn't look finished."  Rats!  I thought I might be able to sneak it by, but he was right.  He also asked if I was channeling Coco Chanel...?  He thought the short quilted top and the short, straight skirt were very Chanel-esque.  Hmmm...That gave me a new idea for the neckline...thanks Honey!

I created a 1960's-ish collar using a strip of the quilted knit.  Much better.  (and the hubby thought so, too!)

The skirt was a bit of an after thought.  I had exactly a skirt length of fabric left...even the width was right.  I didn't even have to cut anything, just zip up a back seam and put in some elastic.  You can see the wide elastic top in this picture....I was trying to get a twig off the string of lights that hangs over the outside table.  Thanks again Honey!


I really wasn't thinking I was going to end up with a little Chanel Sweat-Suit, but there you go!  It may not make the Paris runways but it is very comfy, cozy and hopefully, a useful wardrobe addition.  AND, a really fun project!  Win-win!