4.22.2021

Time Flies, and So Do Snowbirds!

 It's time for this snowbird to migrate back to the northern nest.  It hardly seems like that should be true, but we have been here for 5 months and it is getting dang hot and spring is springing back in Michigan, so off we fly!  Both of us have had our vaccines so traveling this time doesn't feel quite as scary.  

I feel like I have accomplished quite a bit this season (what snowbirds call "winter" wherever they land.).  When I arrived in November with my sewing machines and a nervous cat I wasn't sure I would actually get much sewing done at all.  But with the help of the USPS, FedEx and Amazon, I managed to get myself set up quite nicely in my lofty sewing space and completed several fun projects.  


I wanted to finish up a couple of things before shutting down the Southern Most sewing space.  A knitting project that I started when we first arrived back in November and a 'house dress' made from a cotton beach towel that I found at the local farmers' market.  Kind of on two ends of the spectrum...a fuzzy warm sweater and a loose 'touch as little as possible' dress!  Both ended up being practically zero waste projects as well.  

The idea of 'zero waste' has been interesting to me since I am in a brand new space.  I'm not sure I want to fill it up with boxes of small scrappy bits.  Being more conscious about what I am really using and what I am just stashing away is easier with a clean slate in front of me.  My penchant for having 'almost enough' fabric is actually serving me well in my quest for zero waste.  It does require a bit more head scratching and engineering somersaults, but that's fun too.  But I digress....

If I had kept all of the stitches that I knitted on this sweater I would have about three sweaters! I kept starting and unknitting and trying again and unknitting, I just couldn't figure out the gauge or the style.  To look at the finished product you wouldn't think it would have been such a trial.  I think I just got worn out and needed to get it off the needles before the yarn was worn out too.  I do like it at the end of the day, but it was a wandering road to the finish line!  I can't even imagine putting it on right now, it is close to 90 degrees!!!  But when I started it in November it seemed like just the right thing for January evenings, so next season I think it will get some wear. (I think I will be ready to see it again by then, too)


...and this is what was left!  Whew!

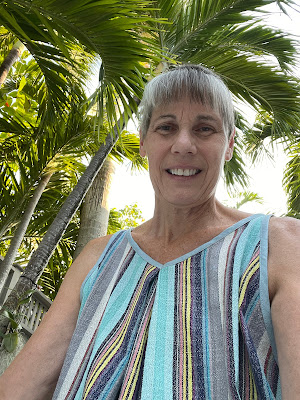
My last project of this first season is a dress that I imagined for the hot days we are having right now.  I wanted something that touched as few body parts as possible!  I started with an old sheet and cut out a piece the same size as the towel I bought at the market.  I draped and folded it until it more or less was a dress shape and then transferred the idea to the towel.  I used the cutouts that I made for the armholes and neck to make the pockets and used a scrap of linen to make bias for the edges.  It literally touches my shoulders and that's it!  It is definitely not a going out of the house dress, but it sure is comfortable in April in Key West.


I love 😍the gigantic pocketses!!!


It's still early days in this new snowbird life style, but so far so good....see you back in Michigan!


4.18.2021

Spot On for April!

 I'm on the third month of my white shirt challenge and it's April and it's getting pretty warm in Key West.  It's definitely T-shirt weather!

This white shirt starts with two T-shirts.  I found some really light and really soft T's at the Gap store.  I got a white one and an ivory one in the largest size they had so I would have maximum jersey real estate to work with.  My plan was to do a 'slow' sew' project ala Natalie Chanin.  I love her embroidered garments with the all over designs, I just don't have the stamina for them and it was already mid April, I certainly wasn't going to get anything terribly elaborate finished in two weeks!  

I carefully took apart the shirts thinking I might want to use the ribbings.  I cut two fronts and two backs out of the white and one front and one back out of the ivory.  


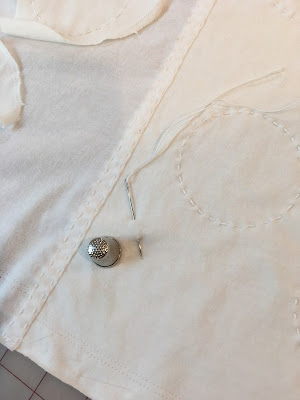
For one side of the shirt I layered the two colors and stitched my design through them and then cut away the interior of the shapes.   On the other side I appliqued the design onto a single layer.  I wasn't sure how well the concept was going to work because the two fabrics were really close in shade.  Once I got it together I think the idea became apparent.  

Because I was using circles, I was particularly careful about the placement of the design, especially on the fronts.😏 I cut out a bunch of paper circles and scattered them around to make sure I liked it before I started stitching.


I used a double running stitch to make the center, side and shoulder seams.  I was standing in front of the mirror pondering what to do to finish the edges and decided I WAS finished.  I left them raw.  The fabrics are so light weight I was afraid that too much stitching on the edges would just make them droopy.  I also like that they echo the raw edges of the appliques.


I was half thinking this would be a 'car project' for the drive back to Michigan, but now I'll have to come up with something else.  I'm glad I have it to wear right now...it is nice and cool!  


That's the April installment, a white on white tank top....now on to May!


4.10.2021

Hello Lounge Lizard!

 I finally succumbed!  I have been trying desperately to hold onto some semblance of publicly acceptable clothing, maybe thinking that I might suddenly need to go somewhere!? πŸ˜† But when I saw the latest pattern introduction from Closet Core I dove straight into the "loungewear" pool.  Who was I kidding anyway!  I have been wearing the same yoga pants and tank top  everyday and frankly, could use some newer, nicer versions.  So when I saw they were available, AND in a sale bundle, I ordered them up!  I had also ordered a few yards of a really nice light weight fleece from Emma One Sock a few weeks ago with nothing planned for it, and thought it would be perfect for the hoodie and joggers.  (Joggers is the new name for what I wore in high school and called "sweatpants," much cuter name and allows an old lady to feel cool and with it! or 'dope'?!)


Since most patterns that I have used need quite a bit of manipulating to get the fit right for my body, my usual first step is to make a 'trial balloon' hoping it will be a wearable muslin.  More often it becomes a chopped up mess of alterations.  I didn't have another piece of fleece to play around with so I decided I would just go for it and if I needed to get more fabric, well, I knew where it had come from!  

I checked out the pattern measurements and figured I would make a size 10 for the joggers and, because the sweatshirt was pretty generously sized, a size 8 for the top.  I did add my normal 3" to the length of the sleeves and the pants, but other than that I cut them straight out of the envelop, with my fingers tightly crossed.  

I realized as I was laying out the pattern pieces that, if I was very miserly, I might just be able to get the shorts cut out as well.  Challenge accepted!  I think I spent longer wiggling pieces around than I did sewing them up!  But, with a few other adjustments, I managed to get the hoodie, the joggers AND the shorts!  How...?

I had already decided I wanted to add a ribbing to the edge of the hood.  The pattern suggests turning the edge under, but I thought a ribbing would give it a bit of tension to keep it from falling too open.  I was thinking I would just use a strip of the fleece, but now that I was in conservation mode, I went looking around for something else to use.  The only thing I had on hand was a slate gray knit, but it looked great with the fleece.  Once I introduced the second fabric I used it for the waistband of the shorts and trimmed the pockets of the hoodie and the shorts so it became a "design detail." (if you do something 3 times it's a design detail not a mistake!)  I also cut the pocket bags out of a light weight linen.  It actually worked really well.  It reduced the bulk of the pockets and stabilized them at the same time.  I reduced the pocket bulk some more on the shorts  by only making the back pocket bag and stitching it through the outside of the fronts.  And finally, I ended up piecing the back yoke of the hoodie.  I knew I would have to piece somewhere and figured the yoke would be under the hood most of the time.  I lined the yoke with a piece of an old T-shirt to keep all the seams from being too irritating across my shoulders.  As I was panning and making all these fussy maneuvers I kept thinking, "this is a lot of work for something that might end up a chopped up mess!"  


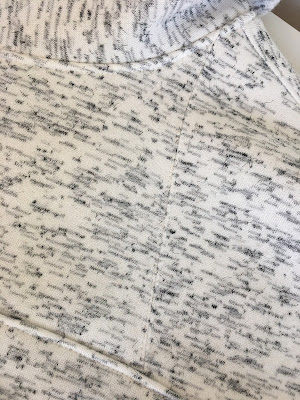
The piecing on the yoke is hard to see from the outside, which was kind of the point!


Well, you can see by the lack of in-progress pictures that I got carried away...again...and forgot to take one photo.  But, I did manage a few of the completed garments, which worked out to be amazing!  I am more than pleased and surprised at how well they fit and look.  I didn't even have to adjust the crotch curve!!!


Whoa!  Where'd those crazy yellow duck shoes come from?!

Now I am wondering why it took me so long to embrace the loungewear trend...but I think there will be more lounge lizarding in my future.   And some more Closet Core patterns as well. πŸ˜‰


4.04.2021

A Tisket a Tasket an Egg Collecting Basket!

It's Easter and I made an egg basket!  Well, I made an egg basket and then Easter happened.  The two events only coincided  accidentally.

Here's the deal...my son and his girlfriend have a flock.  Of chickens!  And they lay lots of eggs that need to be collected. (the chickens, not my son and his GF.)   "Girlfriend's" birthday is at the end of March.  I always struggle with what to do for GF's.  I love them, but they are not easy to gift.  I worry about being too personal, or not personal enough, or too old fashion...anyway, this year I think I nailed it!  

The flock is an important aspect of their lives and I thought something to help with them would be enjoyed and useful.  I have seen wire egg baskets and thought I could come up with a fabric version that would do.  I did get side track by considering an egg gathering apron.  I saw a little girl with an apron with a bunch of pockets across the front and that seemed like a good solution until I realized that you have to transfer the eggs out of the pockets before taking off the apron.  That means you actually have to 'collect' the eggs twice!  Not very efficient.  So back to the basket...

I figured the pockets were a good idea to keep the eggs from bumping into each other, but what size?  I got out some dish towels and eggs and started to engineer my basket... don't they look cozy?


Once I had the pocket size I created a "pattern" that would have an inner and an outer circle of 6 pockets in each circle.  There is also space in the middle of the pocket circles in case the flock is extra productive!

My next stop was my neighborhood fabric store...I love that!  I collected some too cute chicken fabric, some plastic canvas stuff and strapping.  I had some quilt batting in the cupboard.  I wasn't exactly sure what I might need, but I figured there was an egg basket in there somewhere.


I got very caught up in the process, as I often do when engineering a bag, and forgot to take any pictures.  Suffice it to say, that there was a fair amount of growling and gnashing of teeth before the final version emerged..

I put the canvas in the outer circle and batting in the inner one.  The stiffness helped keep the pockets from collapsing into each other and the batting pads the eggs so they stay intact.

I am very pleased with the end product and have heard from the "flock-keepers" that it works really well.  I hope there won't be requests for another one, because I have no idea how to do it again!  This is definitely a "one-of-a-kind" egg basket!