Showing posts with label tea. Show all posts

3.16.2020

Sew British


What a wild winter this has been!  

I'll start with the elephant in the room...like most people I am trying to stay positive and calm amidst the crazy media circus, and most days I do OK.  But I have to admit to more than a few freak out moments, and terribly sad moments, and I'm learning to "social distance" (is that a verb?) and trying to understand the whole toilet paper hoarding thing (????), and how to live in a constant state of worry about the people I love.  On my best days I know we will get to a 'new normal' at some point and life will continue, on my worst days, I melt into a puddle of despair.  

I've been thinking that writing about my sewing adventures seems a bit trivial in our current world.  Then I realized that I have been gobbling up the other sewing blogs that I read.  I am desperate for the connection they provide.  Hearing about how other sewing folks are using their hobby to bring a sense of normalcy has been very reassuring.  So I write this today hoping that as you read it you are doing everything to keep yourself safe and your spirits lifted.  And maybe my sewing stories will be a bit of a break from the heaviness that surrounds us right now.

So, with that said....
What have I been up to on the sewing front? 

I mentioned in my last post that I have been working hard to create some pieces that will be part of a Threads Magazine story sometime in the fall.  I really enjoy doing these because they are usually a bit out of my normal sewing.  There is of course a theme involved and there are often a few garments, each with a little bit different take on the theme.  I sent them off for their photo shoot last week so now I will wait to be surprised.  It's fun to see the models and how the editors style the clothes.

I wanted to get the Threads garments finished before I headed to Britain at the end of February.  My oldest son, who lives in London, was having a major birthday (the kind that end in zero!) and I also, finally got myself signed up for a week long workshop at my latest crush, Merchant and Mills!  I have been trying to sign up for one since I visited in the fall of 2018.  They only have 6 spots per class and they seem to fill up instantly!  I managed to get into a 5 day session the first week of March.


It seems fitting that I started my magical week in Rye at St. Pancras Station in London.  You may know it from Harry Potter fame as the home of Platform 9 3/4.  It was quite spectacular to see it under the full moon!  The high-speed train swept me south to Rye in just over an hour.  Such an easy trip.


The workshop included accommodations for all 5 of us (our 6th person was unable to join us because her company had already imposed a travel ban at the beginning of March) in a lovely converted fire station just across the street from the Merchant and Mills shop.  The outside still has a very 'firehouse' facade, but the inside has been turned into a comfortable modern retreat.


We had use of the wonderfully equipped kitchen and a cozy fireplace as well as our own bedrooms and baths.  It was so nice to end our busy days in such a comfortable space.


Each bed had a lovely package of goodies waiting for us when we arrived...


Merchant and Mills offers several different classes, workshops and retreats.  Some focus on a particular pattern or a technique, the one that I attended was a 'retreat' and each of us got to choose what we wanted to work on during the week.  I think choosing was the hardest part of the whole week!

Each morning we rolled out of our 'firehouse' and across the street to the Merchant and Mills shop and studios...


We could literally choose any of the patterns and any of the amazing fabrics....


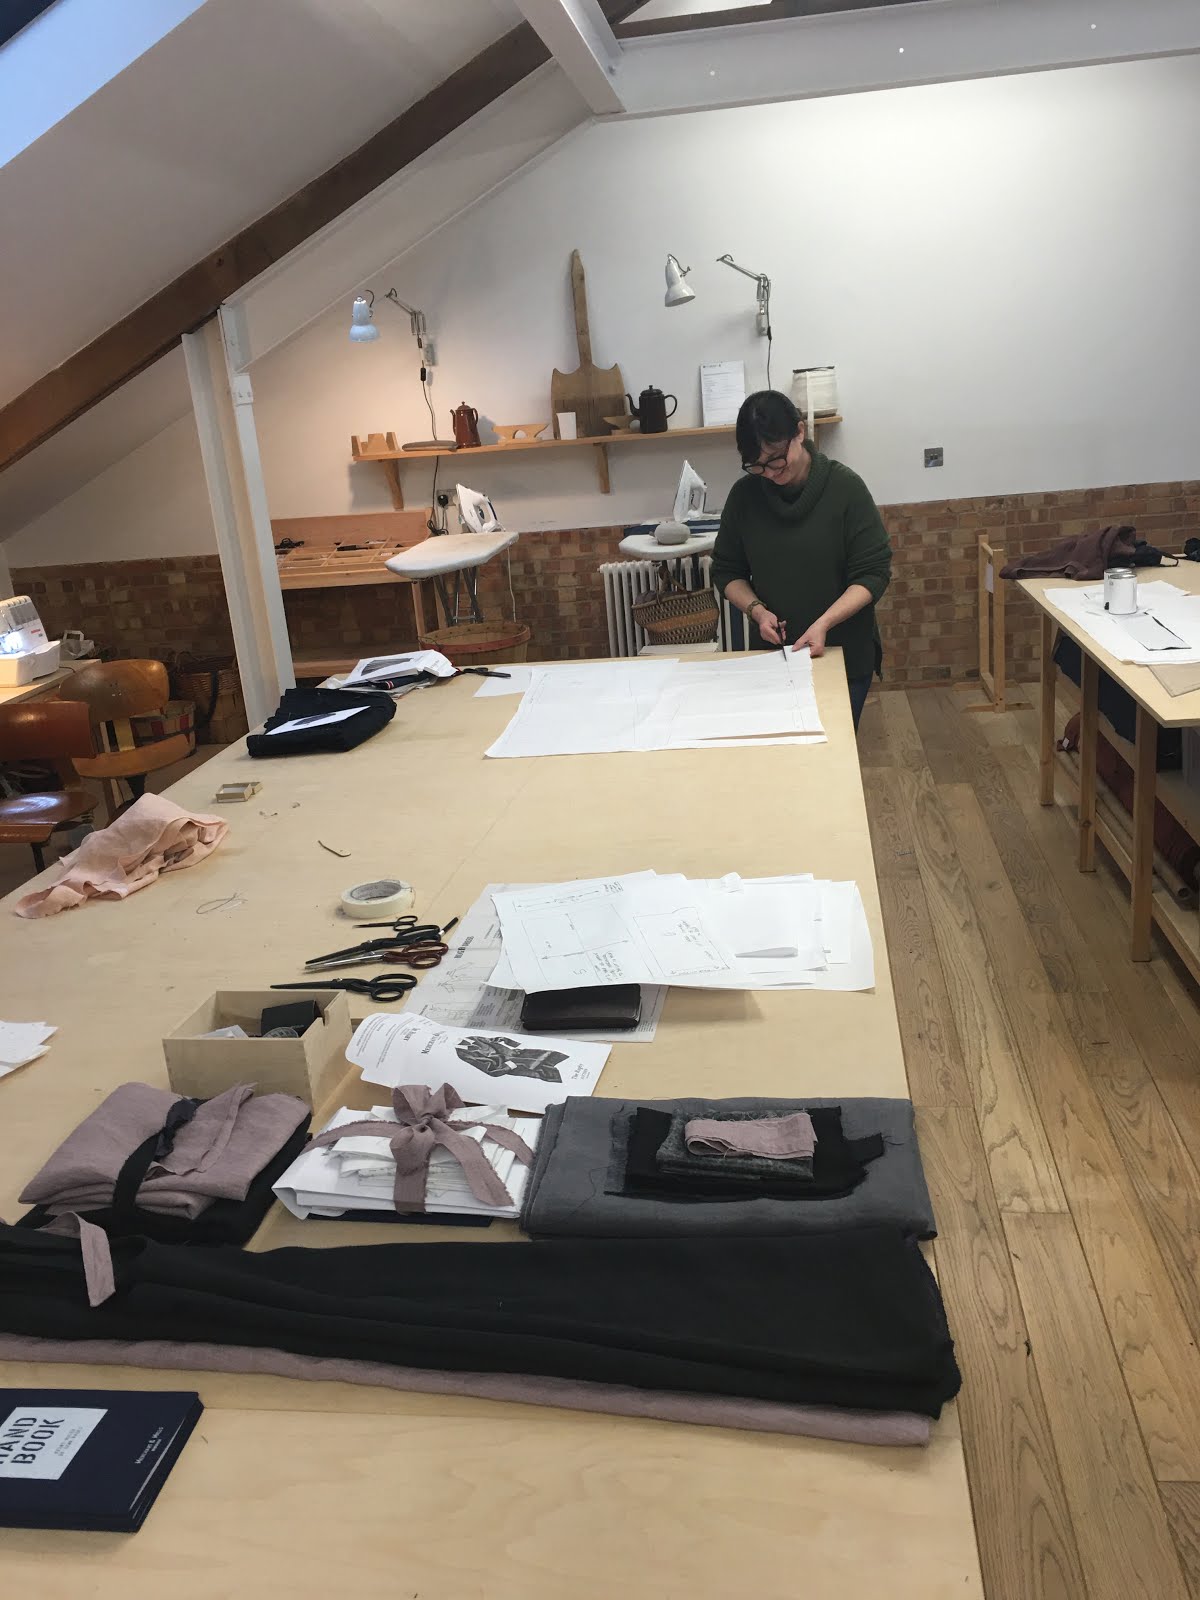
There was plenty of space and light in our loft studio....


Our fearless leaders for the week, Katie and Chrissy had so much talent and huge experience with Merchant and Mills and they couldn't have been nicer people!  They helped us make fabric and pattern choices and guided us through every step of our projects....which meant they shepherded 12 different "makes." (that's Merchant and Mills speak for "projects.")  Very impressive.


Each day we gathered around the dining table at the end of the studio for an excellent locally prepared lunch.  (i.e.  someone else cooked and all we had to do was eat!)  Oh, and I have decided that the next addition to my sewing room is going to be a lovely person who will ask me every couple of hours if I would like a "nice cup of tea."


By the end of the week we all had three or four 'makes' under our belts, along with the delicious lunches and afternoon cake with our tea.  Everyone made pieces that totally reflected their style and everything fit beautifully thanks to our wonderful teachers.

As I stood on the platform, over looking the adorable town of Rye, waiting for my train back to London, I couldn't believe the week was over.  It really did feel like I was in a magical, very British, dream!


Bye Rye....for now!


8.28.2018

Week Four: A T for All!

WOW!  What a whirlwind August has been!  Not only trying to keep up with the flurry of T-shirt projects, but life took off on a bit of a tear as well!

Since the beginning of the month  I have enjoyed an "Outstanding in the Field" dinner at a fruit farm in southwest Michigan...(you can read more about this amazing event HERE.)


...Traveled to Eastern Washington State to join my nephew's wedding celebration, which took place in the small community of Mazama, that was surrounded by wildfires!  Everything was enveloped in an eerie cloud of smoke and ash.  Quite dramatic...


...Spent a short day and a half in Seattle, which was also experiencing smokey air, so we opted for the Pike Place Market and the Chihuly Gardens rather than the Space needle...


...went to Chicago to pick up my sister-in--law who is visiting from Italy and took in a performance of Hamilton...


...AND...contracted pneumonia, just in case I wasn't convinced that I needed to slow it down a bit!!!!


Fortunately, because I knew I had a packed up schedule at the end of the month, I worked on my final T-shirt project before the pneumonia part of the program kicked in. (and kicked my butt!)  So I do have some things to share for our final week of the woven T challenge.

A few observations about the Woven T project before I share my final week's work... Each week I have had literally dozens of ideas rolling around in my head and scribbled on scraps of paper.  I had trouble narrowing down to just one or two.  It was great!!!!  I had been in the "idea doldrums" for most of the summer so having the challenge has been a true jump start.  A boost in creative energy is always a good thing, I'm sure it will carry me right into fall sewing projects.

Rhonda's gift box of fabric was such a treat and catalyst.  It also elicited a reaction that was a total and wonderful surprise.  Each of the gifted fabrics held emotions and memories and price tags and possible projects....but not for me!  They came to me totally unencumbered!  When I pull a fabric from my own stash it comes with all the years of baggage that it has been collecting while waiting patiently for me to decide.  Often these attachments make it difficult to actually use a piece of fabric.  "It was sooo expensive...it was going to be for a wedding in 2002...my grandma gave it to me...and on, and on...."  But, the fabrics that came to me from Rhonda had no little voices whispering to me, they came as pure potential.  I could cut and stitch with abandon!  It was incredibly freeing and fun!  It made me realize how many pieces I have that could get passed along and be freed of their emotional chains and become a catalyst for someone else.  Hmmmmmm...

Thank you Rhonda for all the amazing fabrics, the reintroduction to raglan sleeves and your generous spirit.  It has been such a fun month and seeing your creations continues to inspire new possibilities.


So, on to week four, with abandon!...a "T-for-all!"  We decided we would each do whatever took our fancy for our last week.  😳  Cue the dozens of ideas!

One of the ideas that was inspired by the raglan sleeve pattern was to 'outline' all the seams.


I love using my bias binding foot because it makes a small (3/8") tidy bound edge that can actually be used for seaming.  I also had a tea towel with black and white bikes on it that had been a contender for week 1.  I toyed with adding other colors, but in the end stuck with a black and white theme. 


To use the binding foot, I cut 1" bias strips of black cotton that were fed through the bias binding foot along with the "edge" getting the binding.  I put the wrong-sides of the pattern pieces together and bound them together so the black binding was on the outside of my garment.  The foot folds and stitches the binding all at one time.  It's pretty slick!


The tricky part is figuring out which seams to do first so that all the joins get covered in binding.


I extended the pattern to make a T-shirt dress (since I have 3 new shirts already this month!) and added some pockets.


It's cute, it fits...and, maybe it's because I'm recovering from pneumonia, but it feels a lot like a hospital gown!  We'll see....I think it was better in my head than on the dress form.


Number two idea was way more successful in my book!  Again, the starting point was a tea towel.  A gorgeous tea towel that Rhonda had made from one of her paintings.   It was included in my fun gift box.  I apologize for the miserable color in the pictures, it was difficult to photograph, just imagine the palest of greens and vibrant purples!

I realized that I have been lusting after a Susan Eastman style T all summer and hadn't actually made one for myself.  Rhonda's painting, Susan's style...


The towel needed to be extended and the fabric had quite a bit of body, so I decided to slice it up and add linen strips to soften the hand and create the extra yardage needed for a shirt.  The purple fabric is actually over-dyed kimono fabric (echo week 2), the hand dyed colors are just perfect with the painting on the towel.

I was worried about just chopping into the towel so I made a photo copy and cut that up to try out my idea before whacking into Rhonda's lovely towel.


The striped result makes me think of seeing a flower garden through a picket fence.

And finally, when my sister-in-law saw the blue cotton lawn print that was also part of the infamous gift box, she loved it!  She had asked if I would be able to make her a dress like one she has that is getting a bit worn.  She continues wearing it because it is made of very light weight cotton and is perfect for sweltering late summer days.  The blue print was just the type of fabric she had been looking for...so we whipped it up!  It will definitely be comfortable when the temperatures hit 90 this week!


I used the Chelsea Raglan pattern again with selvedge edges on the sleeves and a facing at the neckline topstitched to the outside.  It's so light and easy, I may need to have one for myself.


My final 'tea recipe' is one that I learned from a friend who practices and teaches ayruvedic yoga methodologies.  Whenever things get a little too crazy this simple warm drink soothes and calms me inside and out.  This week as I have been struggling to regain my strength and rebalance after my mega-dose of antibiotics, it has been the perfect remedy.


Juice a lemon or a lime, it ends up being about 1/4 cup of juice.  Add the juice to about 2 cups of hot water along with several slices of fresh ginger.  Let it cool slightly before adding 1 to 2 teaspoons of honey, finally add a very small pinch of coconut oil.  Namaste! 🙏


8.22.2018

Week Three: Wranglin' Raglans

Please excuse the delay in posting for this week...both Rhonda and I ended up otherwise distracted on Tuesday, but back on track today....

Week Three of our Month long T-Fest is all about the raglan sleeve T.  This week Rhonda and I are both starting with the Chelsea T pattern from Fabric Store.com.  It is a free pattern that you can download and tape together, easy to do and not many pages to deal with.  Rhonda did a post about using the pattern HERE.  She also used it for her tea towel T in week one HERE.

For most people, raglan sleeves are flattering and easy to fit and sew.  But, for a broad shouldered person like moi, not so much.  There never seems to be enough fabric to fall nicely over the cap of my shoulder.   I was a bit worried when Rhonda suggested the pattern because I have kind of given up trying to get a raglan sleeve to fit me, usually opting for a set in or other type of sleeve.  But I took the challenge....

I made a 'trial balloon' of the pattern, once I got it taped together, and sure enough, I got plenty of wrinkling and pulling between my shoulders.  The front and back of the T fit OK and the length of the raglan seam was good, it was just the amount of fabric over the shoulder that was off.  To create the needed room, I did a 'fisheye' adjustment at the shoulder point, which added room without changing the length of any seams.


A second 'trial balloon' confirmed my suspicions, I did need the extra bit of fabric and once it was added, the fit was very nice.  Thank you Rhonda for nudging me into raglan sleeves!  (She is the Queen of Sleeves after all! 👸)

With my adjusted pattern in hand, I started looking around for fabric.  I liked the idea of a good old striped T-shirt.  I thought making the front and back in stripes with contrasting sleeves would be a sporty, fun look.  I found a black and white striped scarf in my drawer and liked it with a beautiful sheer gray silk crepe over it.  The scarf was  not big enough to cover the need, so I went shopping, hoping to find a black and white stripe, preferably silk, to match the drape of the sheer overlay.

I came home with several pieces, one small stripe, one dot and no silk!  I laid the gray over them, along with the striped scarf and still wanted those stripes...and silk!!!


Not giving up, I decided I would make my own stripes!  ...And here's where I got totally carried away!  It sounded like a simple idea...just make some stripes...out of silk crepe de chine...yeah?!

#!@&!!**### (no need to elaborate on that part of the process! 😬)

I did manage to get my stripes and loved them.  The black has a lovely jacquard pattern and I used the matte side of the white.  


Once I got the pieces together, I realized that the simple turned neckline finish recommended in the pattern would not work with the sheer sleeves.  Instead I cut a facing from the black silk.  I turned the outside edges, applied some fusible seam tape and laid it under the neckline on my dress form.  I steamed it to activate the fusible tape and hold it in place and then sewed the right side facing in place.  Worked like a charm!


So my 'sporty' striped T got a wee bit over the top and decidedly schmancy!  But I really like it!  It feels very elegant and refined and I have no idea where or when I will ever wear it!


Since I ended up with such a fancy T-shirt, I thought a fancy recipe would be in order....

The last time my son and his girlfriend visited she and I took a baking class together.  I'm not much of a baker, but she is very accomplished, so I was following her lead.  We made french macarons, which I love but never imagined ever making myself.  I got out the recipe and dove in!  

First the meringue:  stiff peaks


Then add the dry ingredients and fold to make batter that flows off the spoon like "slow lava"
(the dark flecks come from very finely ground Earl Grey tea. Yum!)


Use a piping bag to make a whole slew of little cookies...the paper templates under the parchment paper make the spacing easy. (hint: take the templates out before baking...and don't ask me how I know this *#!!)


Bake, cool...fill with yummy butter cream and enjoy!


This recipe is very similar to the one we used in the class, with the following changes:
Skip the coloring and the flavoring and add 2 teaspoons of very finely ground Earl Grey tea.  I don't care for Earl Grey when it's made into tea, but when you put it in a cookie...yummy!

Even if you never make French Macarons you will want to make this butter cream!  It is totally divine.

2 sticks unsalted, room temperature butter (oh yeah!)
2 cups confectioners' sugar
1/4 cup honey
1/4 cup sour cream
1/4 tsp salt

Whip it all together until smooth and creamy. 

A silk raglan sleeve T and Earl Grey Tea Macarons...totally schmancy!