Showing posts with label Travel bag. Show all posts

8.21.2020

Things are Getting Baggy...Again!

 There was a time not so long ago that every time I sat down to write a post I was talking about a bag!  I was truly on a mission and just kept making version after version trying to nail the perfect travel backpack!  Not sure I am done with it, but for now I am pretty happy with the version that I have been using. (Although the travel has been severely cut back! 😒)  BUT...the other day I got another bee in my bonnet about a "new" backpack idea.  I probably should have ignored it and let it buzz off into the distance, but no, I ran right into my sewing room and started tinkering.

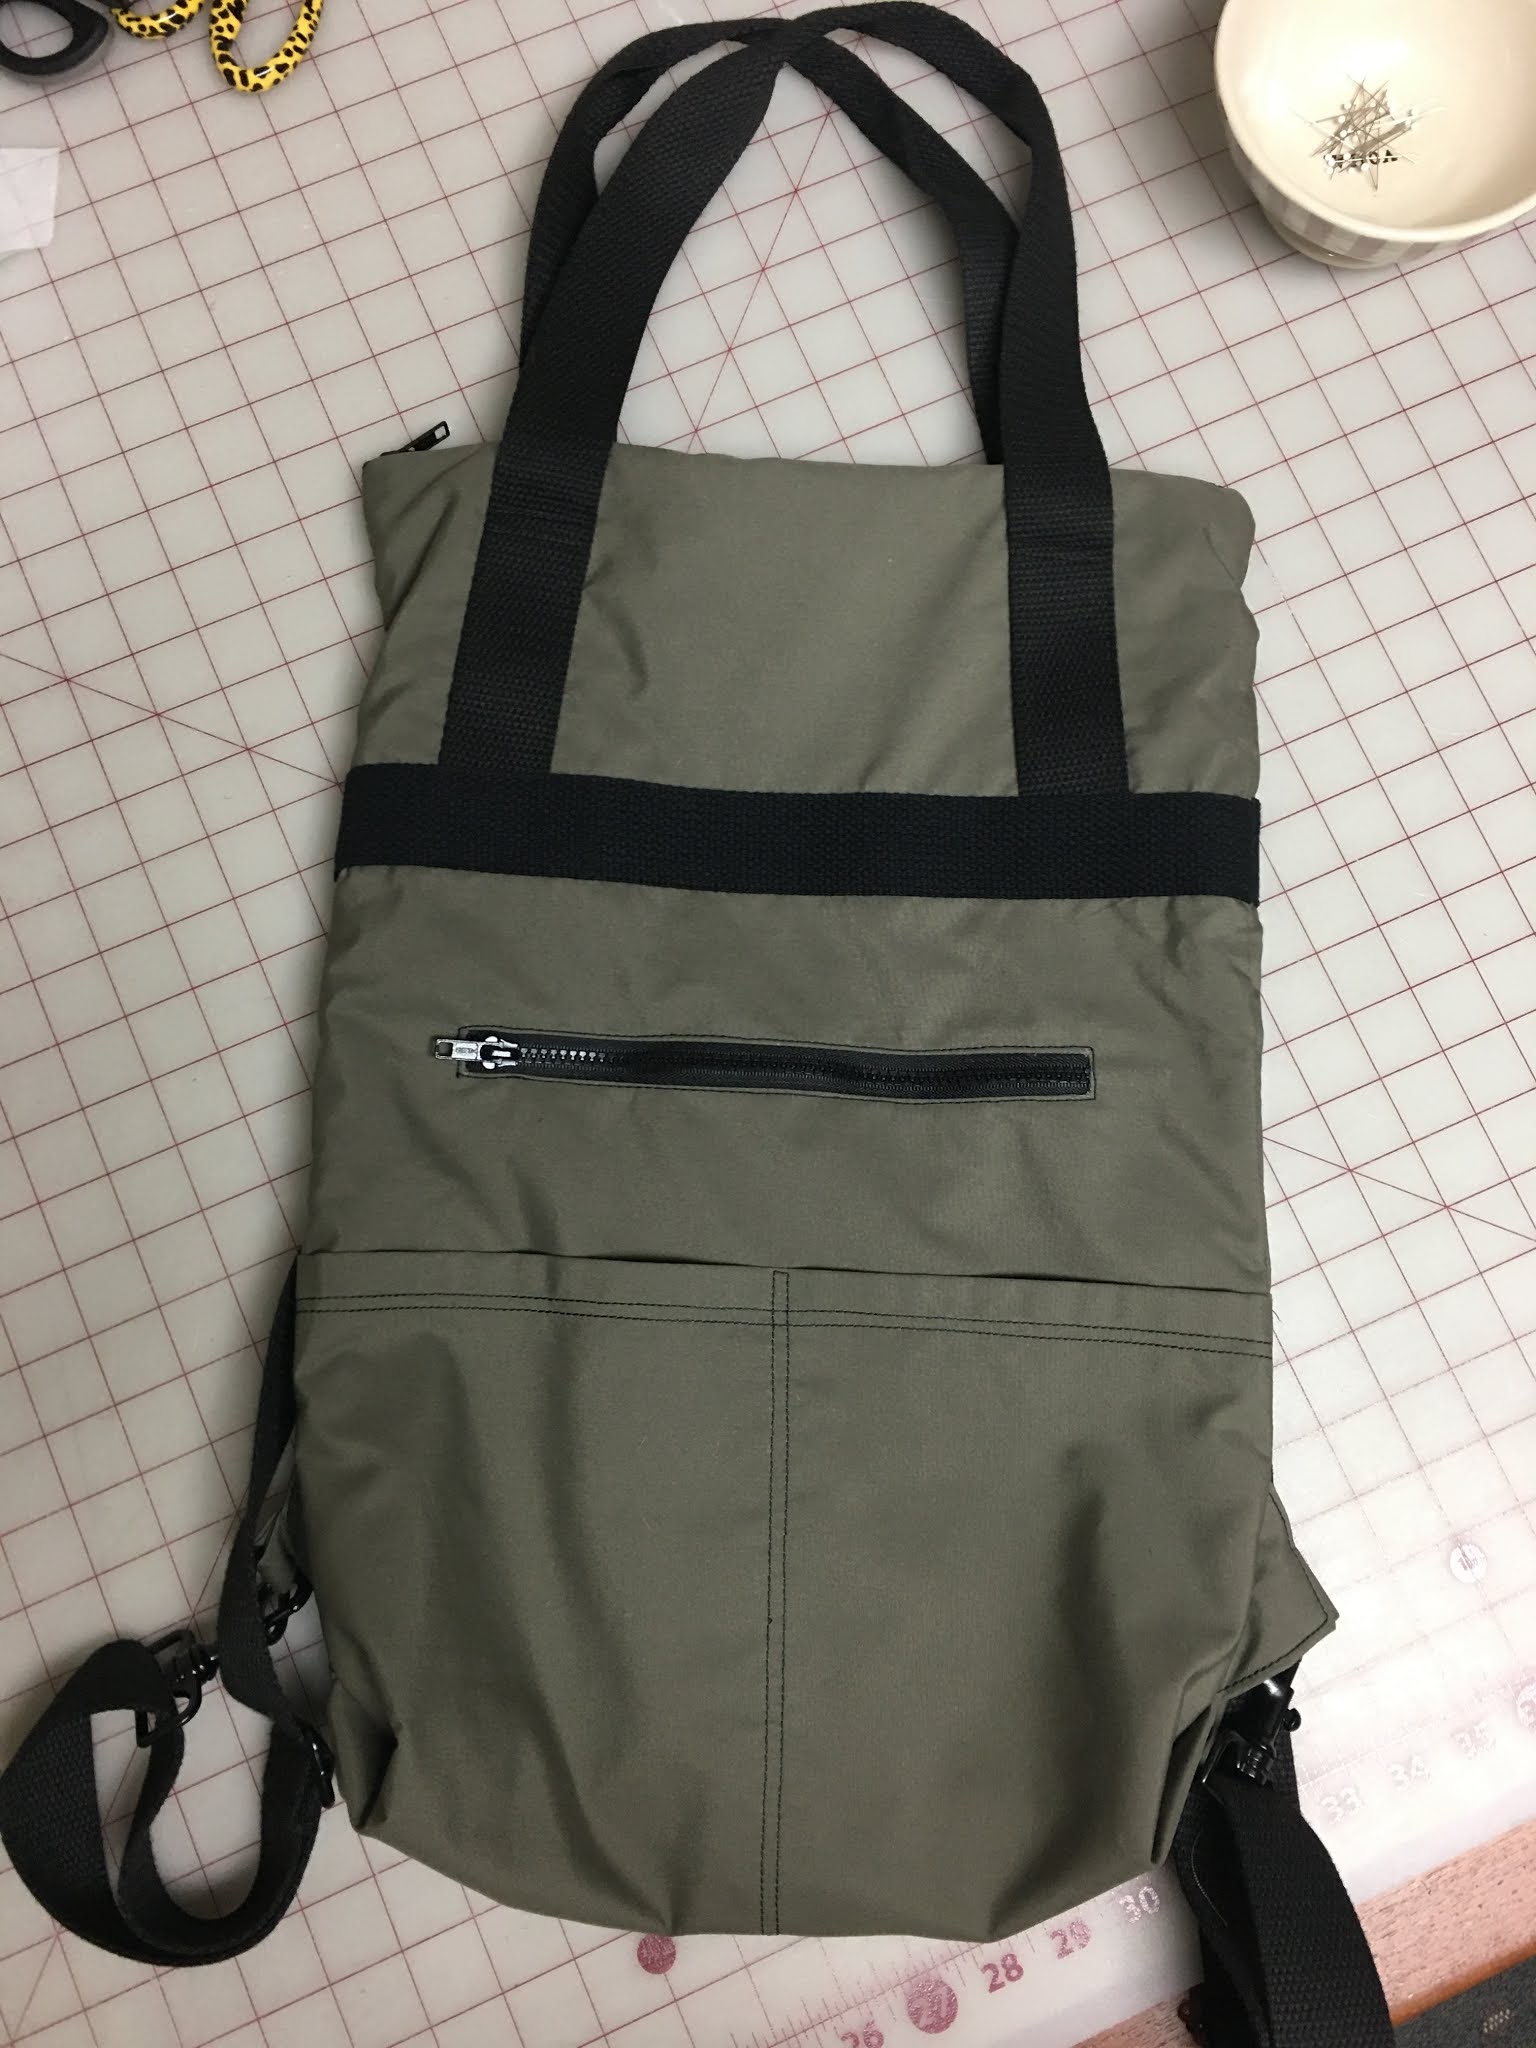
The basic idea is a version of a fold over style messenger bag.  It has a lot of the same features that I was trying to incorporate into my travel backpack...zippered pockets that are concealed or inaccessible when worn as a backpack, some open pockets for quick "in and out" stuff (think sunglasses), a large compartment for big stuff that is out of the way most of the time and magically appears as needed.

So let me introduce you to my 'new' backpack....

The back side that rests against my back when worn has my favorite sideways phone pocket with a zipper of course.


The front side, or the side that is facing the public when worn, has another zipper pocket and two open pockets.  These are concealed by the fold over of the top of the bag.


The top third of the bag folds over to keep it more compact most of the time...but a zipper across the top opens into a compartment that is the full depth of the bag.  Lots of room for fabric shopping!!!


The handles are just long enough to slip comfortably over one shoulder if I don't want a backpack...example...there have been a few occasions that I have had to check my backpack at museums because it was not allowed.  If it had looked more like a shoulder bag it would have been permitted to go with me. 

The first round of my messenger cum backpack bag turned out pretty well.  I like the size, although it is a bit larger than my first pack.  There is a certain opening length to bag depth ratio that makes the inside compartment useable.  I am not sure what it is exactly, but I recognize it when it is wrong!!!  This one is workable.  I am not completely happy with the 'bound buttonhole' type zipper installation, but I have some thoughts....I guess I will be making a few more versions! 😉 Here we go again!


11.23.2019

P.S. More Backpacks!!!

As promised....

Back in September a group of sewing buddies got together to make backpacks.  We spent one VERY long day and finally the group mutinied, cried "uncle" and said they would come back for a second day to finish up the project.  I was super proud that they really hung in there through a whole bunch of zippers and pockets, but it really is more than a one day sew. ....to be continued....

Three of the "packers" were planning trips before the second round sewing day was scheduled, so we had an 'emergency' sewing session to get their packs ready for the road.

This color blocked version is made with nylon ripstop in bright, happy colors.  It turned out great and weighs almost nothing!


This canvas pack has a darling butterfly lining.  (and yes, the bottom of the pack did get finished!)


The maker of this pack never shies away from a challenge.  She quilted several pieces of her pack before sewing them together.  I think she only went through one package of heavy duty needles!!!


...on another fine day later in October....The Bag Ladies got back together to finish their backpacks. I am very pleased to say that everyone went home wearing a newly minted pack!  Each one was perfectly suited to its maker and ready for lots of travels.

                  
These lovely periwinkle and purple packs are made with water proof raincoat fabric.  It's light weight and keeps everything inside nice and dry!


Two more rainwear packs...this time in tailored navy with fun aqua straps and a classic "LBP"  (little black pack!)


This pack uses the same nylon print throughout which is lovely, however!...its' owner has the dubious honor of "most unsewing during the workshop!"  Because all the pieces were the same, sometimes the wrong ones ended up getting sewn together....oops!  Note for future packs, choose different fabrics!  I am very proud that even with all the ripping, the pack turned out beautifully and the maker is recovering nicely.  
She hasn't, however, committed to making another pack at this point.😏


"Hey, did we show up at the party with the same backpack?!"

...not quite...here we have another version of the "LBP" and a great mid century modern bark cloth print with cool rose gold colored zippers.  One of our crew arranged to have all the zippers and hardware for the workshop made into kits.  We used wonderful zippers and buckles from Sallie Tomato.  If you need bag making supplies this is a great website.  The zippers, particularly are excellent and come in a wonderful selection of colors.

I also finished my workshop pack...I had one that I was using to demonstrate with and I didn't want to be the only one who didn't finish her backpack....I really love the hardware on this one.  I got it at the Farm and Family in the horse bridle department!!!!  It also has an additional side pocket for sunglasses.  I don't think the group would have sat still for one more pocket! 😵


It was a challenging couple of sewing days, but everyone stuck with it and the results are terrific!  All the packs are different, but the one thing that everyone agreed on was what fun it is to sew together.  We just don't do it often enough!  I can't wait to see where all of these packs go.....to be continued....


4.30.2019

The Perfect Travel Bag...Again!

I rose on Sunday morning (and let me be clear....it was April 28!!!!!) to this winter fantasyland scene.  While I certainly can appreciate the lovely, sparkly, crispness....IT'S APRIL 28!!!!  The saving grace was knowing that it would be gone by dinner time.  I decided to avoid the whole thing by hiding out in my sewing room.  

My son visited from London a few weeks ago and brought with him a wonderful duffle bag made out of waxed cotton.  It had an ingenious zipper pocket that opened the full length of the duffle and folded down when closed to create a tidy sized backpack.  

Several of my family members and friends have not just noticed, but commented on my growing fascination with bags.  (some may even have gone as far as calling it an obsession!)  Whatever...

I studied the bag, thoroughly.  It was definitely too large for a purse/backpack, but the clever opening got me thinking....

I have a pile-o-scraps left from my waxed cotton adventures last December, so I started with a pocket idea and scraps.  

My increase in traveling over the last few years has helped me hone in on what it is I like about my travel bags.  There are several 'must have' options that I wanted to incorporate into my waxed cotton backpack...

-  Yes, I do like to have a backpack.  I find if I have a one shoulder bag to haul for any extended amount of time I get all twisted to one side.  Much better to have a balanced load on both shoulders.

- Pockets!!!  Plenty!!!  There are several pockets and pocket placements that have become non-negotiable for me.   I want a phone pocket that is on the back side of the pack and opens to the side.  This allows me to swing the pack around on my shoulder and retrieve the phone quickly.  Also, pockets on the back side are more secure than front pockets.

I want a pocket for my wallet, another for my sunglasses/reading glasses, one for all the small stuff that wanders around on the bottom of a bag and is never seen again, and a place for keys to attach.  If I get many more than that I just get too confused!

When I travel I want to take things in a carry-on that I don't necessarily want to carry all the time, i.e. knitting, snacks, a sweater,  a water bottle, maybe my laptop.  BUT, most carry-on bags are too big for wandering around London for the whole day...dilemma!

My plan was to create a backpack that would accommodate my travel needs AND not be too big for a daypack.  I love a challenge!

I spent some time working out the details and running up a couple of prototypes. My plan also had to take into consideration the waxed cotton.  I had to be careful not to gang up too many pockets, linings, stabilizers, straps etc, or I would go through too many machine needles!

My pattern included pockets made from light weight slippery lining to make retrieving things easier, a fully lined big 'cavity' pocket and four zippers of varying lengths.

Just figuring out what pieces to cut out of which fabrics was crazy making!


I worked in segments and then put everything together....here are several of the pocket segments ready to go...


When it finally came together I got pretty darned excited!  (Maybe obsession isn't that far off?!)  Let me give you a tour of my new travel backpack...

Two zipper pocket on the back side...

the top pocket has inside pockets for my wallet, glasses, and keys...

the bottom pocket, with requisite side zip, is just the perfect size for my cell phone.


There is another pocket in the front flap that can hold the little stuff, lip gloss, breath mints, nail file...

So that takes care of the 'walking-around-everyday' stuff.  Now for the extra 'what-I-want-on-the-plane' stuff.
 
Here's where my son's duffle bag comes into the picture...


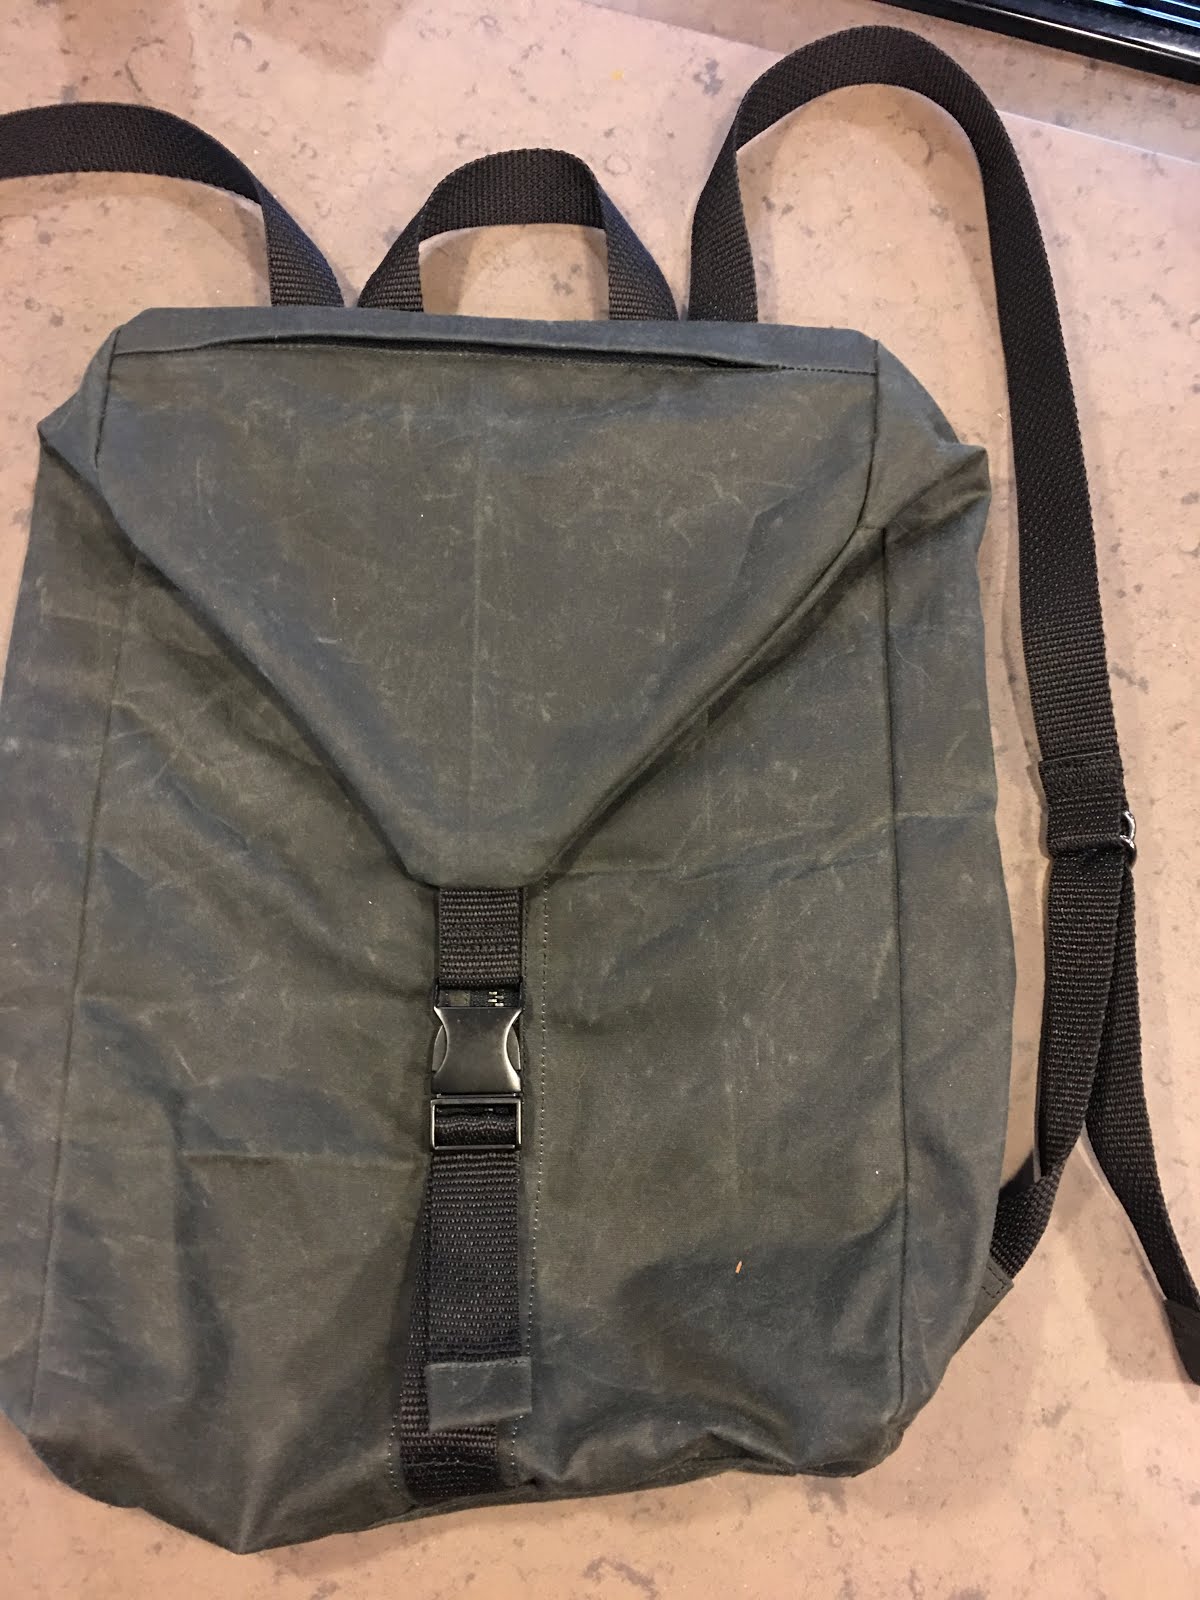
Voila!  Under the front flap/pocket is the biggo cavity that flattens out when nothing is inside it, or can grow to accommodate lots of plane snacks or London shopping finds as needed!


To keep it tidy there is a buckle that can be cinched down depending on the load.


And you might think that so many wonderful features had to come in a monster size...but...It all fits in a neat, perfectly sized package!  AND, don't you think a waxed canvas backpack with black metal buckles is totally cool and hipster for an old lady?!  Please excuse my exuberance...I just get so carried away!


By dinnertime the snow was history and I had yet another 'perfect travel bag.'  I think I'll go buy a plane ticket!
 

4.26.2018

Buggin' Out


It is slowly starting to be spring like...it has been a very long drawn out winter which may be part of why I am 'sick and tired!

I have been struggling with an 'end of winter' bug.  It doesn't seem to want to move on and I am really for it to clear out!  I have so many fun projects that I want to get to, but have no energy to tackle them.  

I did want to support my local ASG chapter (that's American Sewing Guild!) so I rallied for a few hours over the weekend to create a few pieces for a special competition.

The deal is, the National ASG organization sponsored a competition to create a fabric featuring the ASG logo.  The second part of the challenge is for local ASG members to use the fabric to create whatever they want, and the guild who sends in the most items based on how many members you have, is the winner.  The prize is that National ASG will send a national sewing educator to your local guild to do a program!  Kind of a cool deal for our little chapter.  I wanted to help boost our chances, so I took my 1/2 yard of logo fabric and tried to get as many things as possible!  I still have a tiny piece left, but I think I stretched it about as far as I could.  Here are my pieces....


These little pouches are made with Lazy Girl Patterns' Sweetpea Pods pattern.  They are great or little things that always end up in the bottom of your pocketbook!


I made one of my little earring envelopes for traveling.  The logo fit just right.


I used another Lazy Girl Pattern, The Becca Bag for this piece.  I love these for collecting my projects.  I have several with my 'in progress' knitting that I take on my trips.


This is my own pattern.  I think it will be great for sewing retreats, but would also be a good toiletry bag for traveling.  I like the clear pockets.


I couldn't not make some kind of garment... I used my favorite woven T-shirt pattern to make this color blocked shirt.  I wasn't sure when I was making it if I would actually want to wear it, but it turned out pretty cute.  The blue is so not in my normal color palette, so I'm not sure what I will wear with it....we'll see.


I think this may be my favorite little piece.  So simple and yet so useful!  I'd make a bunch more, but it was actually kind of a lot of work!!!!


...And finally....another useful item....

So there you have it!  My 1/2 yard of ASG logo fabric.  It would be really fun to win, but even so, it was a nice distraction from my 'ugly bug' and I have several things that I think will actually be used.  Already a winner!


2.16.2018

Earring Envelope: A Tutorial I think!

It has been quite awhile since the request for instructions for my "Earring Envelope" was made.  I apologize for the wait and hope this post isn't totally confusing.  I realized as I was putting the sample together that there are some steps that might be better understood in person!  We'll see how this goes and of course ask any questions that will help clarify things....

I tried to choose fabrics with good contrast so you will be able to see the steps.  I haven't been in my studio since I got back from my Florida trip, so this was a nice 're-entry' project.   Thanks for askin'!


What you will need

3 coordinating fabrics. I used cotton quilting type fabric, they press well and have enough body to hold the shapes.  The biggest piece is about 11" X 9" so this is a great project for those little scraps that we all seem to collect.

3" X 9" (approximate) light weight fusible batting

4" piece of ribbon

The pattern is my own and I hope you can see the measurements.  When it's flat the folding lines are a bit hard to figure out.  It gets clearer as you start making the folds.  (I hope!) The tricky part is making the inside pockets.  It's done by making a fabric tube and folding it into a series of pockets.


Pattern Piece 1: Pocket Insert


Pattern Piece 2: Outside and lining


Cut one piece for the inside pockets using Pattern Piece 1.

Cut one piece for the outside of the envelop, and another for the lining using Pattern Piece 2.

Cut the fusible batting 1/8" smaller on all sides using Pattern Piece 2.

Cut a piece of ribbon 4"


Sew a 1/4" seam matching the short sides
(8 3/4")of the pocket insert piece, press the seam open, turn the seam to the inside of the tube and then press the fabric tube flat, positioning the seam in the center.  

This piece will be folded to make the series of pockets.


The first 2 folds are made with the seam facing away from you, 1 3/4" from each raw edge.


Turn the piece over so the seam is facing you to make the second 2 folds.


Make the second folds 1 1/4" from the first folds, fold in the opposite direction.


You will end up with an accordion looking series of folds.


Match the first set of folds and stitch them together.

Flatten along the fold lines and press.  

This is the pocket insert.


Position the pocket insert on the right side of the lining piece 1/4" from one of the short edges.  Match the raw edges of the pocket insert with the long edges of the lining.  Stitch the insert to the lining through the mid point.  


Fuse the batting to the wrong side of the outside piece.  Position the ribbon 3/4" down from one of the short edges of the outside piece on the right side. 


With the batting facing up, place the outside piece on top of the lining and pocket insert assembly, sandwiching the pocket insert between the outside piece and the lining piece.  The ribbon should be facing the pockets at the same end.  

Stitch the pieces together with a 1/4" seam making sure to catch the raw edges of the pocket insert in the long seams and being careful NOT to catch the pockets along the short seam. Clip the corners.

Leave the short end opposite the ribbon end open for turning.


Turn to the outside and press all seamed edges well.


Fold in half lengthwise with the lining to the inside of the fold.  Stitch across the end using a 1/4" seam allowance.  Trim the outside fabric and the batting close to the seam. Trim lining corner at the folded edge.


If you have a point pressing tool, this is a good place to use it!

Press the seam open forming a point.  

Turn the point to the right side and press again making a clean point and centering the seam.


Topstitch the point on all three edges to secure it.


Slip stitch the inside most pockets together along the outside edges to form a center pocket.  There should be 5 pockets in all.


Fold the point over the pockets and through the ribbon to secure.  Press one last time.


Load your envelope up with earrings and other jewelry and away you go!