Showing posts with label stretch woven fabric. Show all posts

8.02.2019

Going with the Flo!

I'm so excited!
Rhonda (Rhonda's Creative Life) and I decided to do another "sew together."  If you remember the last one got interrupted by Rhonda's icy tumble in February, which resulted in a broken wrist!  Ouch!  She is all healed up and ready for a month of sewing.

Rhonda suggested that this August we get to the bottom line and do four weeks of pants.  That's right...pants.  I have been sewing for, well, a really long time and pants are still the toughest garment for me to fit.  Just thinking about crotch curves fills me with anxiety...cue the horror movie music!  But we have some fun things planned so maybe it won't be too scary.

Here we go...week one:  "Getting to the Bottom Line"

This week is about our favorite pants pattern.  The one that we have been tweaking and fussing with forever!  I would like to say that my particular fitting opportunity with pants is something that has happened as I've gotten older, but if I am honest, I have always had a pretty flat butt.  Yep, I have never really filled out the rear view.

The problem usually shows up as a whole lot of extra fabric at the top of my leg...where a butt is supposed to be...figuring out how to remove the extra folds of fabric has been an ongoing challenge.  But, last year I read a blog post and the writer was raving about a Style Arc pants pattern, The Barb Pant.  I decided to check it out.  I was just about to pop it into my shopping cart when another pattern caught my eye.  It was the pattern that I have been searching for...cue the heavenly music!  Honest to goodness it is called, "Flat Bottom Flo."  Into the cart it went.

The Barb Pant

I haven't tried it...I got distracted by Flo...but the reviews I have seen really seem to be positive for this one.  If you have a butt, which I don't, this might be worth a gander.

I have tried several other Style Arc patterns and have found them to be consistently good.  The instructions are straight forward and they use some clever construction techniques that turn out a very professional looking garment.


Here's another one I should probably try...The Becky Yoga Pant! 😉

(It is so easy to get distracted on the Style Arc website.)


Now meet Flat Bottom Flo. 😇

From the illustration she might not seem all that different from other pants patterns out there.  I have to admit my skepticism when I ordered it.  How many pants pattern rabbit holes have I been down! Here I go again!  But, oh, did Flo deliver!

I decided to try it straight out of the package, no changing, no monkeying around, straight up Flat Bottom Flo.  She rocked my world!  I have never had a pair of pants fit so well on the first round.  I had to sit down for awhile and let it sink in... could it be that I had finally found THE ONE?

While the first go was rather breath taking, there were a few of the usual suspects that needed to be dealt with.

One of the things that I figured out after many many miserable pairs of pants, was an alteration that changes the grain line of the legs.  If your knees bow out or knock together you may have experienced this issue.  It shows up as diagonal folds running across the front of the pants making them appear to twist around the knees and shins.  I tried all kinds of things to correct this and finally found this simple change in my Singer Sewing Book: Pants That Fit.


In my case, I needed to adjust for knocking knees.   Essentially the idea is to move the center of the pant leg to align with the center of my leg, which means I need to move it about 1/2 inch toward the inseam.  Once the lower leg of the pant lines up with the center of the ankle, a new grain line is drawn that corrects the hang of the pants and, voila! no irritating folds across the legs.  

This little 'personal problem' was not something that Flo dealt with, but having done it a million times, it was a quick fix.

So what, you may ask, is the secret that makes Flat Bottom Flo my new favorite pattern?  WELL...
I'm not sure I completely understand what is different, but here's my best guess.
(Warning:  you may want to skip to the end if you have a low tolerance for lyrical waxing about crotch curves!)

1.  The shape of the dreaded crotch curve!!!

Most pants patterns angle up from the crotch seam to the center back.  This is a great idea because it puts a bit of bias stretch across the fullest part of the bum and makes a nice comfy, sittable pair of pants.  But as I mentioned (did I mention?) that I have no bum to accommodate!  So, for me this arrangement ends up with droopy extra fabric across my backside.  Unattractive and vexing!  Flo has figured this out.  Basically there is no 'curve' involved, just straight up the back.  I had actually figured this out, but altering pants that already have an angled crotch curve usually requires not only changing the angle but then dealing with the extra inches that end up around the waist.  It sort of just moves the issue to another location!  Excellent work Flo!

(I know, I used black!  Hope you can get the idea anyway.)

The back crotch seam is basically a straight line.  Or as I like to refer to it, my "L" shaped crotch curve.

You might also notice that the seam angles down from the front to the back.  I don't know that this is particular to 'flat bottoms' or done to recognize the effects of gravity on our lovely tushies!  Anyway, Flo figured that one out, too.


2.  "Can I please just put a fisheye dart under my butt?"

Before I met Flo, I would finish a pair of pants and grab an inch, sometimes more, of fabric under my butt and say lots of bad words.  If I had been willing to live with a silly looking dart going horizontally across the top of my pant leg, I would have solved this problem years ago!   Well, leave it to Flo to think of it!  The back of the pattern is in two pieces, the main leg and a yoke.  This cleverly conceals the 'dart' so no one is the wiser, effectively pulling the #!%^*** folds of fabric up and out of the picture.  Well done Flo!


3.  "Does this pattern make my butt look big?"

One of the first things I noticed about the Flo pattern pieces was how different they were in the proportions of the front to the back from other patterns I have worked with.  There is WAY more back than front, which seems a bit odd if the problem we're dealing with is 'no butt.'  I have to admit that this detail is one that I have not quite figured out.  My best guess to date is that by pulling the side seam toward the front the hip curve that is usually built into the side seam, is eliminated, along with some of the extra fabric.  (If anyone else has a theory about this, and is willing to wander around in the weeds of pants fitting with me, I'm all ears!)  For whatever reason, it works.  Thanks Flo!

Check out the difference between the front of the pants and the back!!!  Whoa, can that be right?


...and finally...4.  Flo is designed to work with fabrics that have a bit of stretch.  She doesn't go all the way to 'negative ease' territory, but the close fit does allow some 'smoothing' to happen.

So there you have it...my way-too-much-detail analysis of my favorite pant pattern.

For this iteration I chose a woven stretch with good body and a fun houndstooth pattern.


If you have ever worked with stretch woven fabric before, you might have noticed that the stretchiest direction is often with the grain.  In this case there was quite a bit of give along the grain of the piece and very little in the cross grain.  This meant that I needed to put the pattern pieces on the cross grain to get the stretch going around my body.  (this always feels a bit odd)

I'd like to say that I cut these out and serged 'em up and walked out the door with not a single glitch, but Flo and I haven't gotten to that point in our relationship yet.  (or maybe I just can't imagine making a pair of pants without trimming and restitching the crotch curve 7 times!)  These are as close to 'one and done' as I have ever accomplished.  I timed myself and it was an hour and a half from flat folded fabric to pants (sans hems).  And that included just one small crotch curve tweak.  It is very difficult to adjust for the give in any particular fabric, so I chalk it up to that! 

It turns out that making a pair of black pants is much easier than photographing a pair of black pants.  The black and white versions are marginally better...
They are still sans hem.  I haven't decided what length to make them.  Having grown up in the era of being teased for having 'highwater' pants (given my height and leg length, I really had no choice!) it is still really hard to make pants too short on purpose.  I know it is fashionable, but....still thinking on it.


My pick for favorite pants pattern ever...I'm going with the Flo...Style Arc's Flat Bottom Flo.

Check out Rhonda's pick HERE. 
We'll be back next week with the next installment of "Getting to the Bottom Line!"


4.01.2018

Stress Busting Shirtdress

Last week was very stressful.  Since retiring I haven't had a lot of 'very stressful' to contend with, so it really wiped me out!   As I have done all my life, I headed to my sewing room.  Sewing has always been my version of therapy.  A good project completely takes over my thoughts and pushes other stuff out of the way for a minute.  It's like a little vacation for my brain.  And last week I needed a really consuming project!!!!

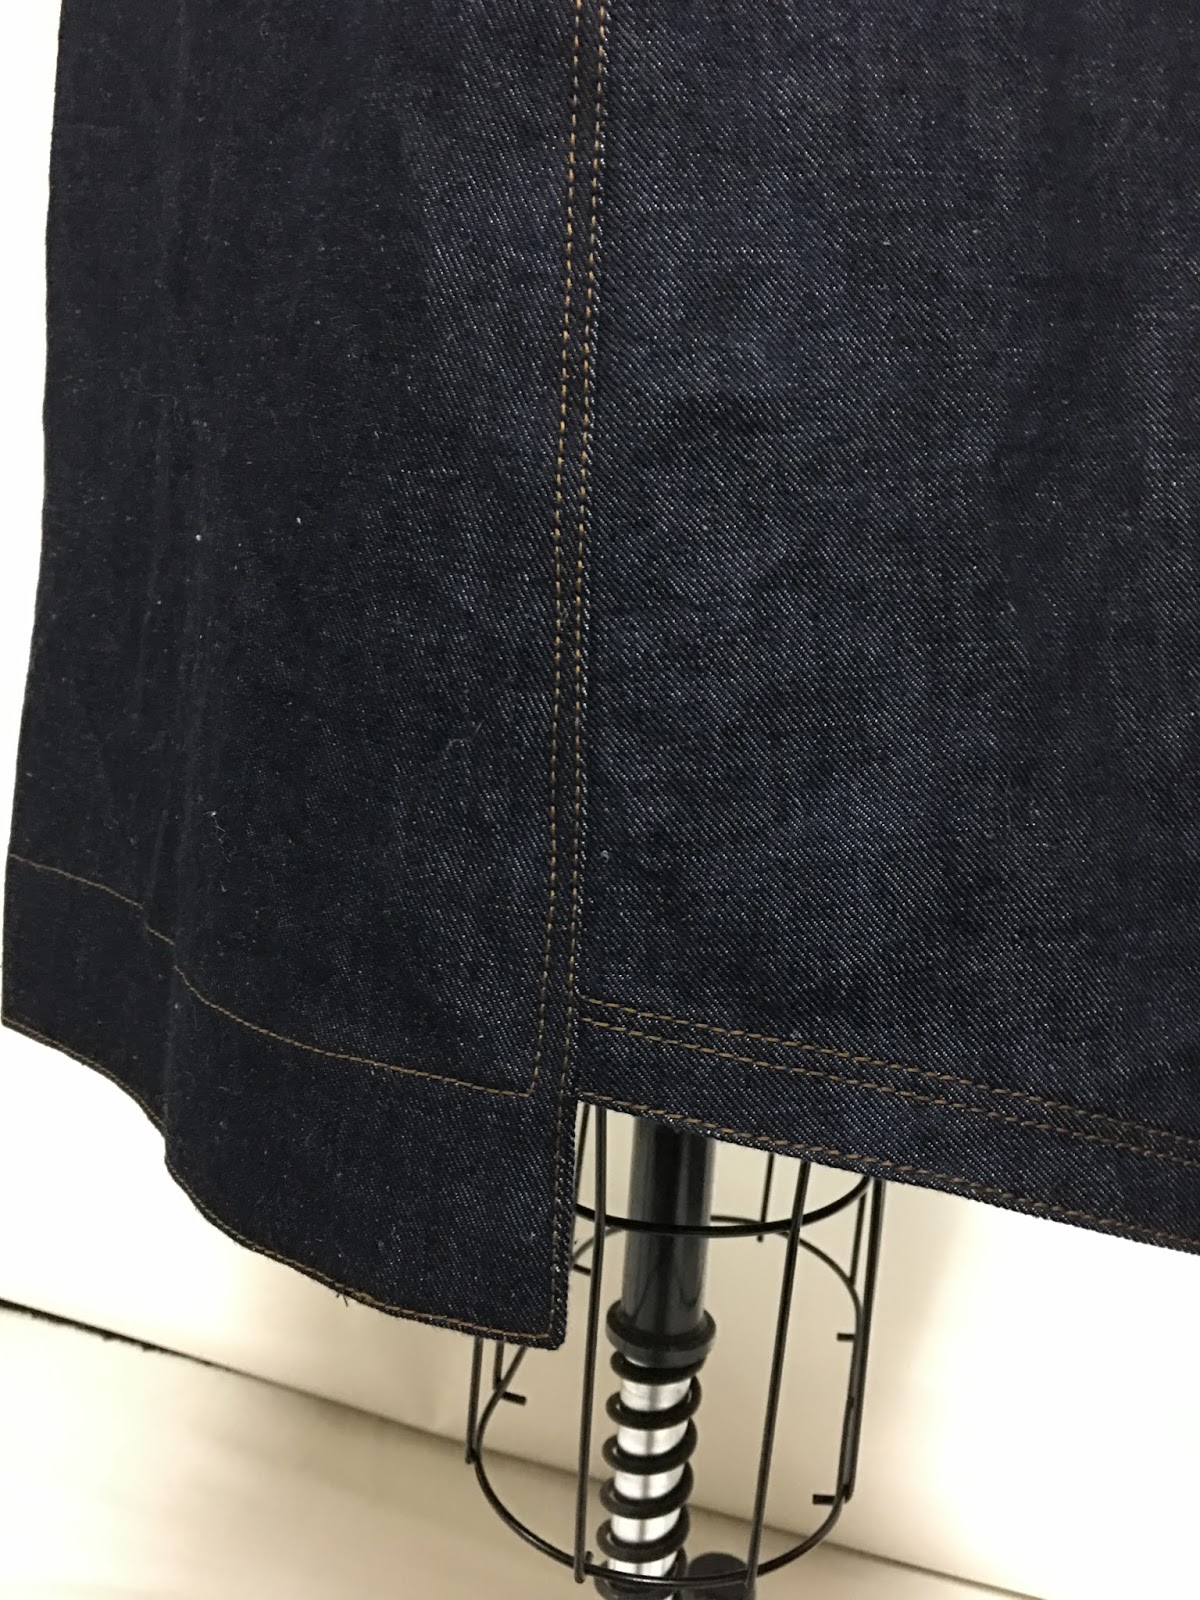
I have been seeing shirt dresses and in particular, denim shirt dresses all over the place this spring.  They look cool (temperature and otherwise) and easy to wear and I want one!  I had hunted up a light weight very dark washed denim with a hint of stretch to make my version of a denim shirt dress.   I decided it would be the perfect 'therapy project' for last week.


I knew I wanted lots of fun topstitching on the dress.  A bunch of precise topstitching seemed like just the ticket for distracting my monkey brain for awhile!  It requires full focus and engineering the order of seaming to get the right overlaps is a thought consuming puzzle.  Excellent!

I started with my current favorite vest pattern, see it here and here.  I like the shape and it works well with more structured fabrics.  I washed the heck out of the denim to soften it up a bit and to avoid turning my fingers blue as I worked with it.

I had been clipping pages from the gazillion catalogues that show up in my mailbox, of denim and shirt dresses as inspiration.  Plenty of decisions to keep me focused!

I decided:
  • sleeveless
  • back shoulder yoke with center pleat
  • waist seam on the front
  • side pockets
  • collar with collar band 
  • shirttail hem in front, straight in back
  • and snaps


There would be more deciding along the way, but these got me started.

When I got the side pockets sewn, with 3 rows of topstitching and was ready to sew the front skirt to the front bodice...I realized that the dress needed to come down in size by about 2 inches!!  Arg!  

Normally that would be a simple fix by taking bigger side seams.  I decided that taking out the pockets was NOT an option, so the front skirt got a nice little center pleat!  

I knew there would be more decisions along the way!


As predicted, the topstitching was excellent therapy and actually got a bit out of control!


I used a scrap of a Liberty of London fabric that my husband had gotten for me on a trip to the UK, for the inside back yoke.  The light cotton lawn kept the yoke from getting too heavy and added a little surprise on the inside.

I like to use double thread to add heft to topstitching.  I had almost two full spools of thread when I started which I thought would be plenty.  This is what I had left when I finished!  Whew!

The week didn't get noticeably less stressful, but the dress did the trick!  As I worked on it I felt the familiar sense of calm that sewing can give me and the sense of losing track of time.  I know some people go for a run, or eat a package of Oreos, or hit pillows with wiffle bats...for me it's getting lost in a place where I feel confident, and creative and safe.  AND...I get a new dress!  I'm looking forward to wearing it on a lovely, stress-free summer afternoon.  Ohmmmmmmmmmm..........


2.25.2018

Pinball Wizard!

I've had a bit of trouble getting back into my studio.  I thought the 'envelop' tutorial would ease me back, but, not so much....I have ventured into the room a few times but mostly I bounce around like a pinball and end up remembering some very important business, like unloading the dishwasher!!!!


What I realized is, this pinballing feeling is actually a familiar state for me.  It usually shows up around the time that the seasons are going to change.  I'm over whatever I was thinking and planning for the current season, but not quite prepared for the next one.  It feels a bit early in Michigan to be thinking about spring and summer, but the fashion industry is already talking about next fall so I guess it's not to early to start piling up my linen projects!

In the spirit of more intentional sewing, I decided to 'watch myself' as I make the shift from winter to spring this year.  I know there must be a process, because it happens every year, so what is it? I think the "pinball feeling" is the initial step!

My brain has been busy collecting for awhile.  Images, colors, fabrics, techniques, patterns, ideas....all of this collecting is spinning around and creating that bouncing behavior.  I pick up a pattern, but am not sure what fabric I want...I find a cool shirt on Pinterest, but need to figure out the pattern, I read about a great technique in my Threads Magazine (wink, wink) and go trolling about for the right project...I'm like a dragonfly stopping for a few seconds here and there and then off on another mission.  So today I decided to look at my collection and see if there was enough stuff to start making a plan.

I have been aware that I'm being drawn to a little different color palette.  Of course, it's still very much in the 'mud colors' range, but I have noticed a pinkish-brownish-grayish color wiggling into the picture.  It's as good a place as any to start...


This color, which I'll call pinkish-gray for lack of a better name, started making an appearance in my yarn choices.  In December I started working on an alpaca cardigan (center) that was leaning in the pinkish-gray direction.  I carted a pile of linen and cotton yarns to Florida and back (left) but ended up working on a yarn that I picked up while I was there (right).


I also went to an artisans' fair while I was in Key West and bought a really cool eco-dyed linen dress...and guess what?....Yep, it's pretty much pinkish-gray. (there are a few blotches of gold, which come from tumeric!)


OK...a new color...


I next went hunting around in my closet to see if there were other hints of this color.  Obviously, it is not a total departure from my go-to palette and sure enough I came up with a cotton cardigan that I love but haven't really worn in awhile.  Excellent!

Let's take a wander in the ol' stash...

...a nice gray (with a hint of pink) stretch denim...a double sided gray/print ponte knit...how about something to give a bit of contrast...like a nice dark washed denim to round out the group.


I left that pile to marinade and moved on to another challenge that has been sitting on my table this fall and winter.

I have a gorgeous alpaca cardigan that keeps looking for an outfit.  Let's see...
I know that it is not hiding in my closet, been there, so how about the stash?  I'm liking the brown wool jersey, it has a hint of green that really blends with the heather of the sweater.

AND it looks fab with the tweed sweater I knitted last fall!  How about a gray (greenish) stretch twill, a cool novelty knit with velvet stripes and maybe that dark washed denim from the first pile ...


Whew! That's starting to feel like a couple of piles of potential....how about some pattern ideas...I hauled out the clipping file.  This is a folder that collects pictures, little sketches, catalog pages, etc. that catch my eye.  I started looking for themes...it appears that I am wanting a denim style dress (maybe that's the reason the dark denim ended up in the fabric pile?)...


...and there is also a group of tops that are conspiring...hmmm?


...how about the yarn stash...any potential there...????


The pinball feeling is starting to dwindle...I'm feeling the stirrings of a real plan...on to the pattern stash...


I think the wool jersey and the double faced ponte would be great dresses, and the cardigan needs a short waisted style....where's my journal...?


So THAT'S how I do it!  From pinball to plan!  
The collecting is fun and necessary, but working the ideas into a plan helps me focus and actually get to making stuff.  Of course you will notice that I always work in pencil!  There will be significant edits, about faces, total deletions and curveballs before the end of the season.  But, for now, I can head into my studio and instead of bouncing I can start pouncing (sorry, I couldn't help it)...😝


11.16.2017

New Jeans and a Little Wine!

In my last installment (A New Perspective) I shared the flannel shirt that I made to wear with my OSKA sweater vest.  The rest of the plan was to make a pair of pants out of a woven stretch blend with a cool jacquard weave in taupe and denim blue.  The overall effect of the weave and the colors ends up looking kind of like...gray...but livelier...sort of.

It's impossible to see in this photo, but trust me, there's a pattern in the fabric! (more pictures to come)

With the fullness of the vest and the gathers in the shirt, I knew the pants had to fit more like leggings or slim pants.  I ran up a 'trial balloon' of a pattern that I did for knit pants and....let's just say that balloon did not get much lift!  I put the fabric aside to wait for some inspiration.

I had plenty of mulling time while I was visiting with my Mom and one of my sisters in Sonoma, CA for a long girls' weekend.  

We were concerned that the trip might not happen when the fires started, but by the time we arrived, things were getting back to normal.  It was scary to see some of the burned structures, or what was left of them, but the land actually knows what to do about fire.  The old Live Oaks have been dealing with fires for 100's of years, vineyards, it turns out, are so high in moisture content that they act as a natural fire break.  By next spring the dark charred land will be sprouting new, fire nourished green and the cycle will continue.  AND, the grapes were already bubbling away in their tanks turning into lovely Sonoma Valley wine!   We took several opportunities to bolster the economy and add to our cellars!😏


Me and Mom! ...and the gorgeous fall colors of the vineyards!

 It was actually a pair of my sister's 'skinny jeans' (which looked fabulous on her!) that provided the inspiration I needed.  As soon as I got home I hunted up a pattern that I had worked on a few years ago and haven't done much with recently, but thought it would be perfect for my fabric.  It requires a very stretchy woven and that's just what I had.


I made the pattern several times to get the fit and the details the way I wanted them.  Because of the way you construct the jeans, it is difficult to do any fitting once the pants are finished.  The seams are stitched and top stitched as you go so you put the last seam in and hope like heck that you got it right.  

The amount of stretch in the fabric also makes a big difference in the final fit, and I was pretty sure from my earlier experiments with the pattern that my fabric would work with the adjustments that I had made. Some of the changes I did...I raised the rise!  I am OK with my jeans sitting a bit lower than my waist, but these were more extreme on me than I was comfortable with.  I straightened out the boot-cut legs.  And I added my own pocket logo stitching (that was fun to design).

There are not many times that I just cut and stitch without fitting or draping as I go, it made me a bit nervous but I just cut, sewed, finished and hoped like heck that I got it right. 


Pretty happy with the results!


I added some squares of interfacing to the inside to help stabilize the fabric where the belt loops are attached....I did a riff on my initials (BF) to make the pocket logo stitching.  You can see the pattern in the fabric better in these pictures.  

Making jeans is one of those things that most people put on the 'mission impossible' list, which is where I had put it until I came across this Jalie pattern.  The instructions are very well done, the fit (with a bit of tweaking) is very jean-like, rather than pants with jean details.  All in all a satisfying sew!


It has definitely turned the corner here from summer to fall and we may even be looking at some wintery stuff in the next week!  Actually finishing a fall project in time for fall... Bonus!