3.22.2021

Color Blocking with White

 When I decided to challenge myself at the end of February to make a white shirt once a month I thought four weeks between shirts would be plenty....Wow....I can't believe how quickly the four weeks slipped by.  I'm going to have to pay attention and not waste any of my weeks.  It's easy to say, "I'll do it next week."  But when you only have four, you can't push it off too many times!

I did have to wait for my white fabrics to arrive, so I couldn't get too much of a jump on March.  I ordered several versions of white fabric from "Gorgeous Fabrics."  I had a hard time choosing, there were lots of lovely pieces, but in the end I restrained myself a bit and picked out four to get me started.  The fabric came right away, it was lovingly packed in tissue and plastic to keep it white, and Ann from the store sent me a very nice thank you email which I thought was extra special.  I felt a bit bad about unwrapping them and shoving them unceremoniously into the washing machine.

Here's what I got...

The bottom right hand corner is an ivory rayon twill.  It has lots of body and I already have an idea for how I want to use it.

Next to that is a soft cotton batiste.  It is very fine and sheer, almost a voile.  It is more lofty than the rayon and has a matte finish.

Next, a silk organza.  I really wasn't thinking about using it for the challenge, but I needed a new press cloth so I ordered it up to help get to the 'free shipping' level!  It might find its way into one of the shirts, we'll see.

The luscious stuff next to the organza is a silk georgette heavily embellished with tropical leaf embroidery.  I was afraid it might be stiff, but it is wonderfully soft and drapy...I'm going to have to think hard about what to do with this one.  Maybe just look at it!

And finally a great handkerchief linen.  It washed up beautifully, as did the batiste and the rayon, and has that telltale crumple that screams "I'm linen."


As I pondered what to do for my March project, I realized that it is the detail that distinguishes a white shirt.  It would be easy to end up with a whole closet of the same shirt.  With that thought in mind I, decided to use both the linen and the batiste.  If they were two different colors I would say that I was going to 'color block' them to add interest to my shirt, but I'm not sure what you call it when all the fabrics are the same color?  Anyway, that was the concept I was going for.


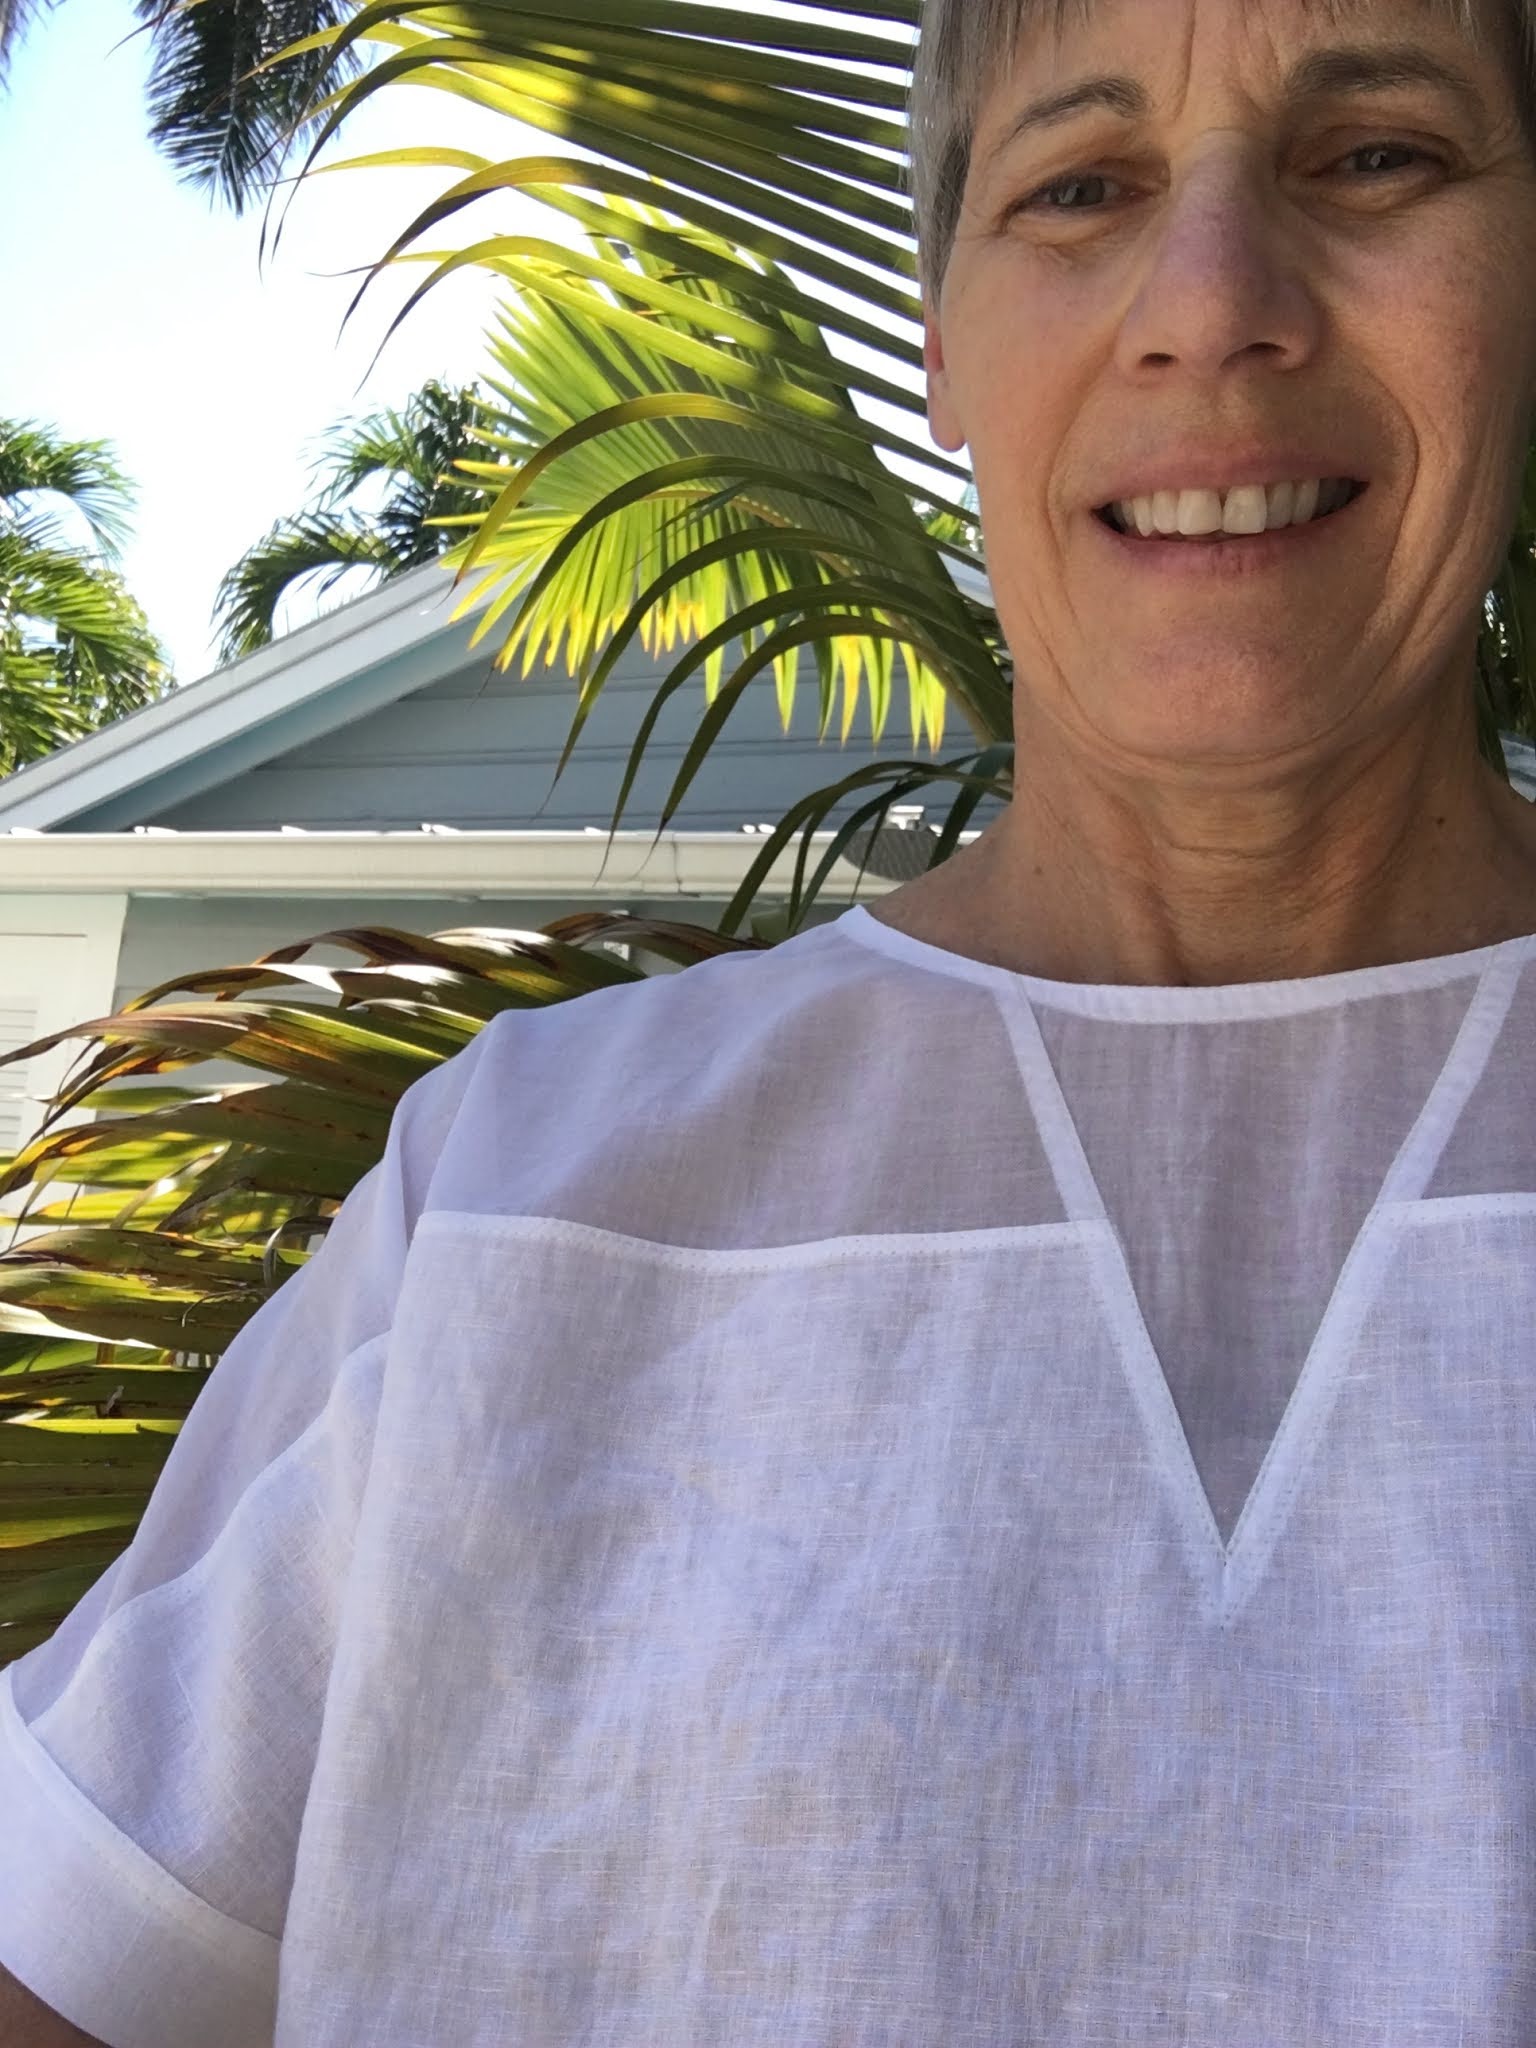
I chose my cut-on-sleeve, pull-over top as a starting point.  I made the yoke seam before cutting out the pattern which gave me nice clean edges to work with.  Because the batiste was so sheer, the seams became a focal point.  I spent a lot of time measuring and folding to get them relatively the same width.  I was planning to use a twin needle to do the top stitching, but the zigzag that is created with the bobbin thread actually showed through the sheer seams, so I ended up doing double rows of single needle stitching to finish the seams.  The neck is finished with a bias facing of the batiste and I added linen cuffs to finish the sleeves.


I am very happy with my "color-blocked" white shirt.  I think the two fabrics are great together and the seam detail gives it some interest.  I think I will enjoy wearing this one.  No rest for the wicked...on to April!


3.08.2021

Gone Fishin'

 I am quite excited about my white shirt challenge, which is basically an excuse to order up a whole bunch of white fabrics.  I find a lot of inspiration from actually holding and draping the fabric, so until my box-o-yardage arrives I will have to find other projects to keep me entertained.  

When I was at my fabric store hunting up stuff for my first white shirt, I couldn't resist a cotton print that was perfect with a piece of batik that I had hauled with me from Michigan.  I also found a really soft dark chambray that had to go into the backpack as well.  I was on a roll after my shirt so I pulled them out.  I can't remember where or when the fish fabric came into my stash, but it seemed like a good one for KW.  When I saw the greenish one with "water drops" on it, I thought it was meant to be.

I only had a 1/2 yard of the batik and the same of the water drop print, so I needed to pick something that wouldn't need much fabric.  I have been wearing an Ethel Designer Top (Style Arc Patterns) a lot since we got to Key West and the design lines are perfect for mixing and matching.


It's a pretty straight forward project, figuring out which fabric to put where took longer than actually sewing it together!  I  used the selvedge of the water drop fabric to accent the triangle piece of linen at the neckline.  The batik is a really nice weight for this top, the cotton is a bit heavy but I think it will be OK.  Note to self, choose very soft, drapy stuff for the next one.

I didn't have much in the way of scraps when I was finished.  Pretty close to a zero waste project!


When I washed the chambray it turned out really soft, but felt more like shorts than a shirt.  I can't remember the last time I have had a pair of 'denim shorts' ....

I started with my PJ bottom pattern.  The softness of the fabric meant that an elastic waist wouldn't be too bulky, not the usual case with denim shorts.  I made some fun pockets, which are impossible to take photos of...trust me they are adorable!  Back pockets...

Front pockets...


Another pretty straight forward project, although I did struggle to get the length right.  My husband kept rejecting them as "too long."  (He's admittedly a leg man 😏)  I did want a pair of 'shorts' after all.


...And they look great with my fish shirt!  Score!


Now I just relax until my white fabric shows up!

3.02.2021

A Little Challenge for 2021

 2021 has been looking suspiciously like 2020.  The main similarity being the inability to plan anything!  I do realize that there are yogis out there who spend their whole lives trying to be present in the moment, but the present moment does not inspire me right now!  I need a heading, something to point my compass at....nothing monumental or earth shaking, just a little something out there in the wilderness to make my way toward.  Since traveling is still a big unknown it can't be an anticipated vacation, or visits with friends and family.  After considering a few options I landed on a sewing challenge.  What and when I sew is pretty much in my control and that is what I need, something that doesn't depend on "acts of God" or the whims of politicians.   I have been having a bit of trouble getting my 'sewjo' going and thought some kind of challenge for myself would get me moving and keep me going.  

I thought about joining in on the "make nine" challenge that many people do, but it requires that you choose nine patterns and nine fabrics that you want to make over the year.  This is just not possible for my brain.  I never really know what I will be sewing until I'm doing it.  The idea of choosing NOW what I want to be sewing in September?...I don't see it.  

I have a sewing buddy who got herself a whole bolt of white linen.  She wants to make a pile of white shirts.  Ever since she mentioned this it has been rolling around in my head.  I decide I would do a 'white shirt' challenge this year.  I made a few last summer and it was fun and challenging to make each one it's own thing.  I love playing with different textures and weights of fabric, the style possibilities go on and on, and choosing white fabric on line is much more doable than trying to match colors!  I am targeting one shirt a month...doable but not strict...I'm not going to beat myself up if I don't get 12 in the year.  In fact, since this is March already I only have 10 months left anyway! 

This idea took shape during the last week of February.  If I was going to start in February it was going to have to happen right away.  C'mon sewjo don't fail me now.  Not at the starting line!  I masked up and made a quick trip to my corner (literally on the same street) fabric store and came up with a white canvas duck cloth.  ...I said it was going to be a challenge!  I also found some metal buttons and twill tape, here we go.  Talk about staring at a blank canvas...😏


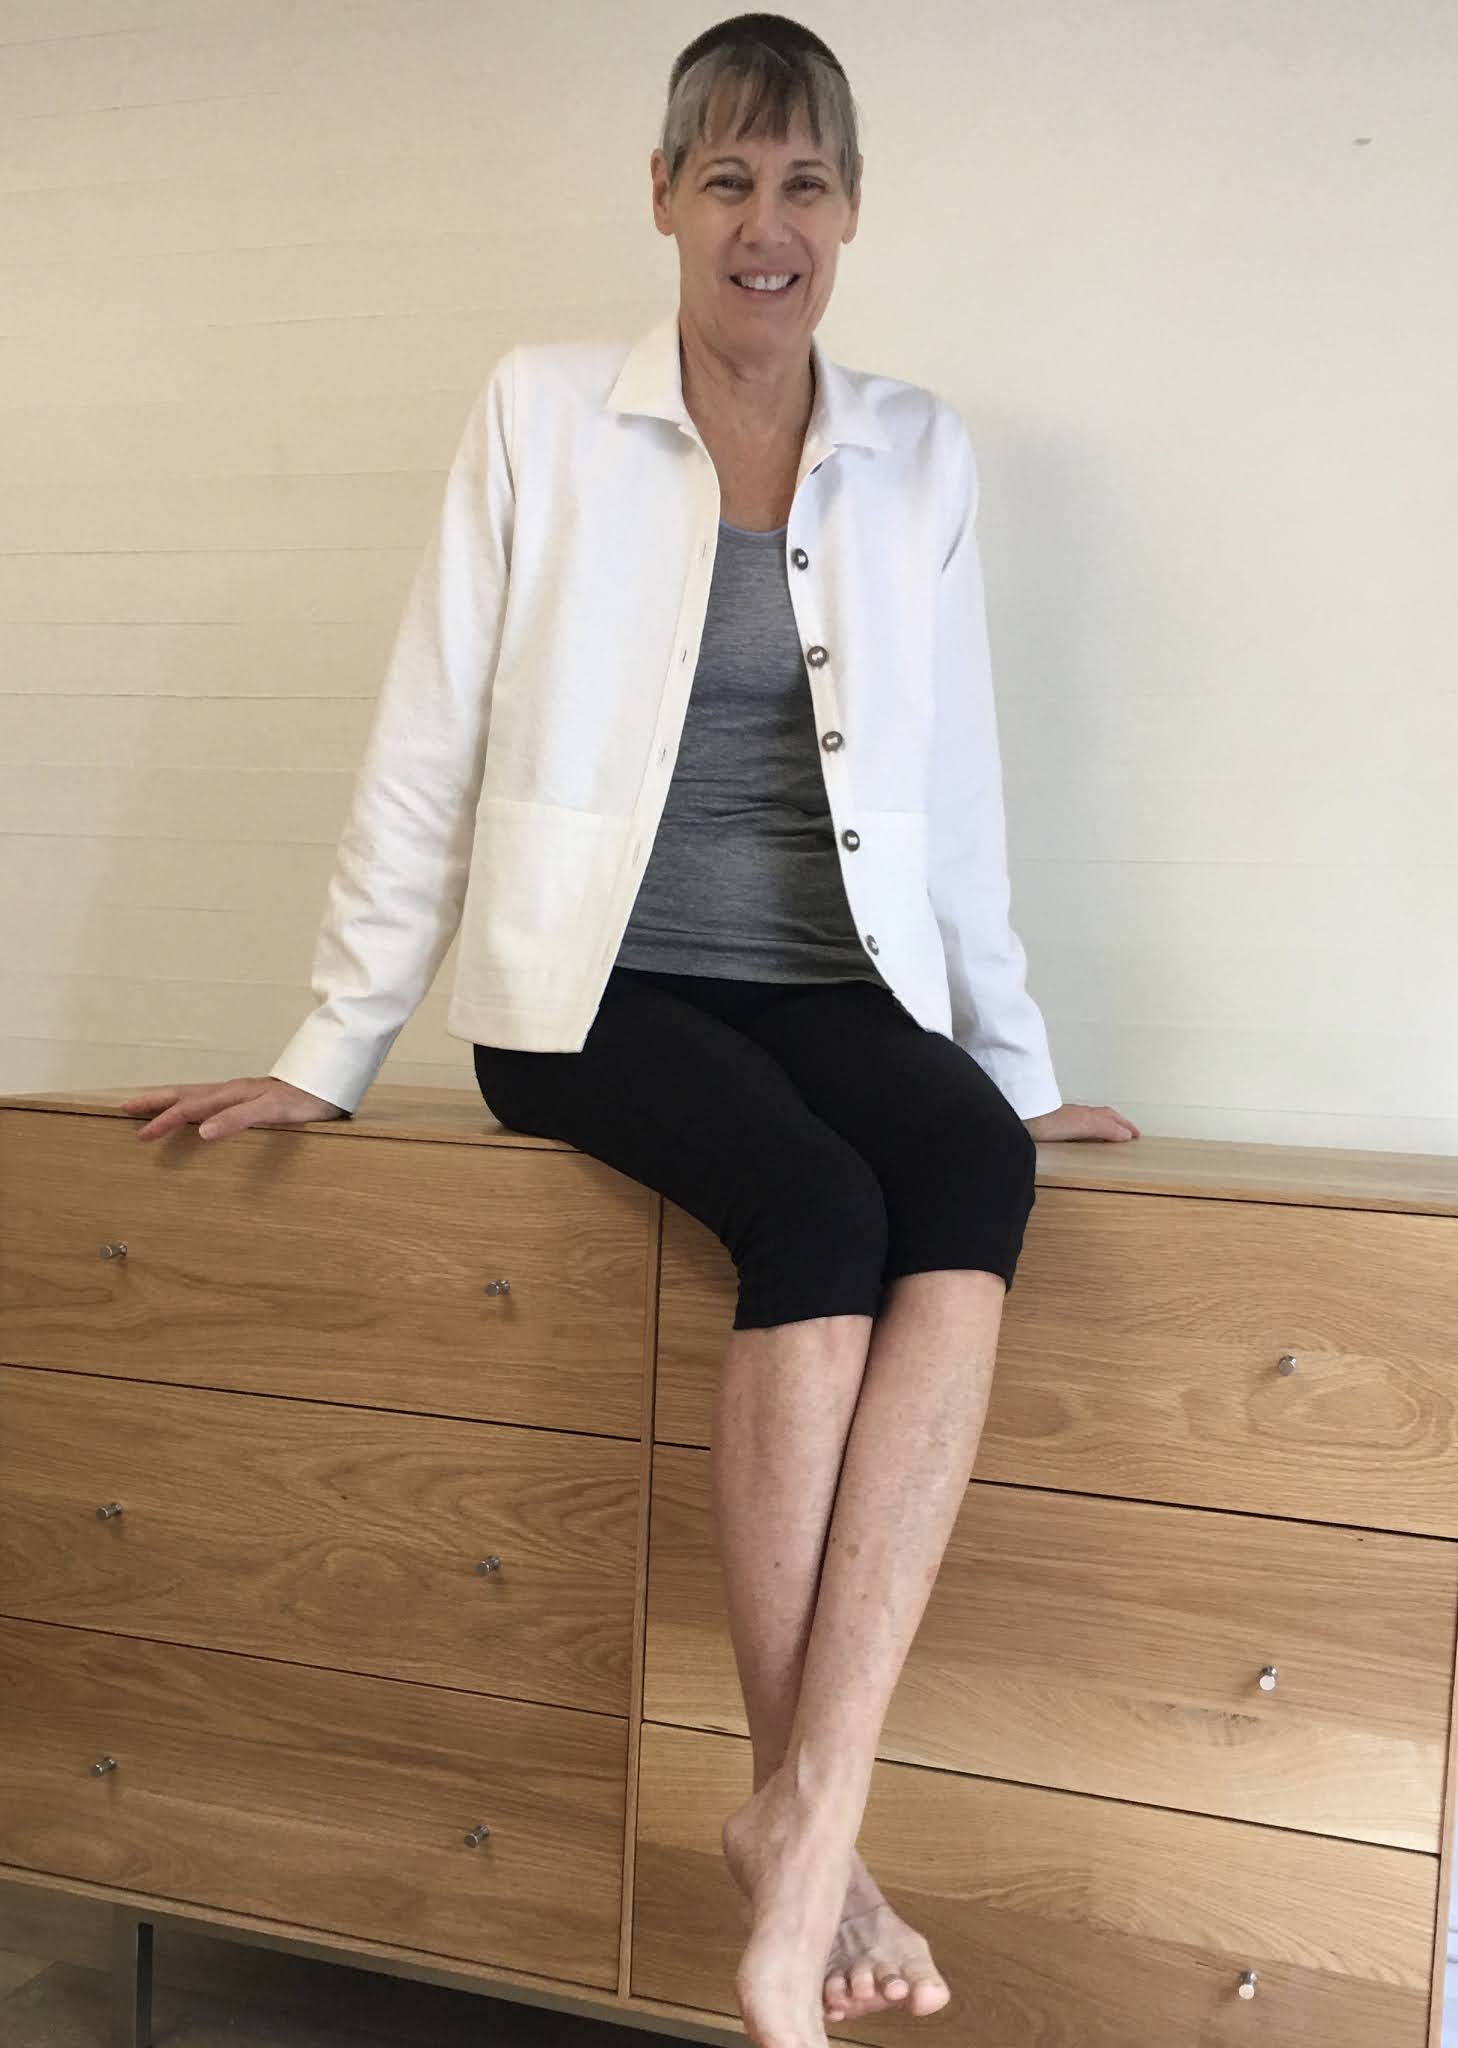
The weight of the fabric suggested a shirt-jacket of some kind.  I pulled out my Tabula Rasa pattern as a starting point.  I love the sleeve of this pattern and it would work well with my canvas.  Topstitching also came into the plan...back to the corner for heavy duty thread.

One of the things I really like about the Tabula Rasa is the sewing order.  I like getting the collar and front details finished before adding the bulk of sleeves to the mix.  


The metal buttons had little slots that I threaded the twill tape through.  I stitched the tape to the center front between the buttons.  I got all six buttonholes perfect in the first go!!!  Too bad they were all 1/2" to low for the buttons!!!!  Argggggggg.  The sound one makes when ripping out five perfect buttonholes!  

Once the fronts, back and collar are ready, the sleeves and side panels are connected and the seam is done in one pass from the front hem over the shoulder to the back hem.  No fussing around in little confined arm holes.  This construction method is also great for adding topstitching details.


I added some extra topstitching to define the pocket....(hard to see it with all the white!)


So there you have it, the first of my white shirts (I'll have to come up with a catchy name for my challenge, maybe for March.)  A white canvas shirt-jacket.  I think it will be perfect for breezy evening walks to the beach.  


I'm not sure if it will continue the rest of the year, but having this little challenge got me motivated and sewing in the last week of February.  I'm already ruminating about the March shirt.  We'll call it a good start!

2.12.2021

Easing into My New Sewing Home

 I sewed!

Don't get too excited...the resulting product is not as impressive as the fact that I SEWED!  I have been so busy making a sewing space that I had forgotten why I was doing it in the first place.  When I finally did get in there to do some actual sewing, I realized that I had done a darned swell job setting up my work space.  Things were at the right height, the surfaces were big enough for their intended use, the spacing between work stations was very nice and in the right order...you might think I had done this a time or two 😉...so what did I sew?

The first thing I did was re-make...for the third time...a pair of linen pants that I bought a few years ago.  The first redo was to lengthen them.  The second was to rework the drawstring waist into a knit waistband.


And the third was to put the drawstring BACK on!!!  (OK, I'll fess up, that I also took about 4 inches out of the circumference of the pants, which made a big different, as you can imagine.  The drawstring didn't have to work nearly as hard as in the original version.)  Since I had long ago discarded (or perhaps it is still lurking about in Michigan somewhere?) the first waistband and drawstring, I needed to make a new one.  I used a piece of tropical print batik from my neighborhood fabric store.  The light weight of the fabric was just perfect and the little bit of print for the drawstring made these old pants feel new...again!


We'll see how long this iteration lasts.

Since I was on a wide pants kick, my second project was to make a pair of PJ bottoms.  I had a piece of really soft cotton lawn that looked oh so tropical.  What I didn't realize until I started to lay out my pattern is the palm tree design is directional.  I thought about ignoring that annoying little fact and making my pants with upright palms on the front and upended trees on the back...hey, they are PJ's, who cares?  Well, I did.  I knew it would drive me crazy even if I couldn't actually see it.  (Is there a clinical name for that?!)  So instead I made them with all the palms growing up and just let them finish where they finished.  Upside down palms I couldn't handle, but cropped PJ bottoms...OK.


This next project needs a little introduction...
When we were acquiring the necessary kitchen equipment to get us started here, the need for oven mitts became one of those things that you can't believe you are spending that much time trying to figure out!  We got some that looked like perfectly adequate oven mitts, but soon realized that basically we kept burning our arms and sticking the mitts into whatever hot, gooey mess we were trying to retrieve from the oven.  We both wanted the "ones like we have in Michigan!!!!  Waaaaaa!!!!   Said mitts are simple mitten shaped affairs made out of neoprene.  They keep us away from hot stuff, but are much more maneuverable than the clumsy, quilted ones we were trying to use.  The hunt for neoprene mitts was on!  ...and on...and on...with no luck!  How hard could this be?  I finally decided to get some fabric and make them.  (I have a sewing room!)  I found different neoprene fabrics, but had no idea from the descriptions whether they would be thick enough to do the job.  I ended up opting for two neoprene lunch totes that I could cut up and make into mitts.  Like I said, way too much time on my hands.  But I did end up with oven mitts very much like the ones we like and they are doing a fine job, and aren't they just the cutest?!


This last project was actually done before the sewing room was ready.  I had unpacked my sewing stuff to measure and figure out what size tables I would need and, well, since it was out...and since I had found a lovely rayon challis around the corner...

I made a simple dress using the Monty shirt/dress pattern from StyleArc.  I made a tunic top with the same pattern using similar fabric and have been wearing it a lot.  The kitchen counter worked pretty well for a cutting table although my new one is waaaaay better!  The dress feels cool and easy and the colors remind me of the sea.


...I even had buttons in my "stash" that worked perfectly!  

I'm starting to feel some southernmost sewjo....👍

2.06.2021

My Southernmost Sewing Room

 One of the "must haves" that we put on the list for our relator last year when we were looking for a house in Key West was a dedicated space for me to set up a sewing room.  It seemed like a luxury, but I knew that I wouldn't feel at home without somewhere to sew. (My husband was totally on board with this knowing what it is like to live with me without a project to work on!)  As we visited houses, it was clear that this might be a bit tricky to accomplish.  But our relator came through and we ended up with a lovely loft room that is perfect for a sewing space.  Because it has very sloped ceilings it wouldn't work for much else IMHO!  Since arriving in November, I have been collecting furniture and fixtures that fit the space and create a darn tidy sewing room!   Before I could actually move into the space, we had to redo the A/C and do some work on the stairs that access the loft.  (which are outside, how cool is that?) I am very excited that the work has been done and I can move in and sew.

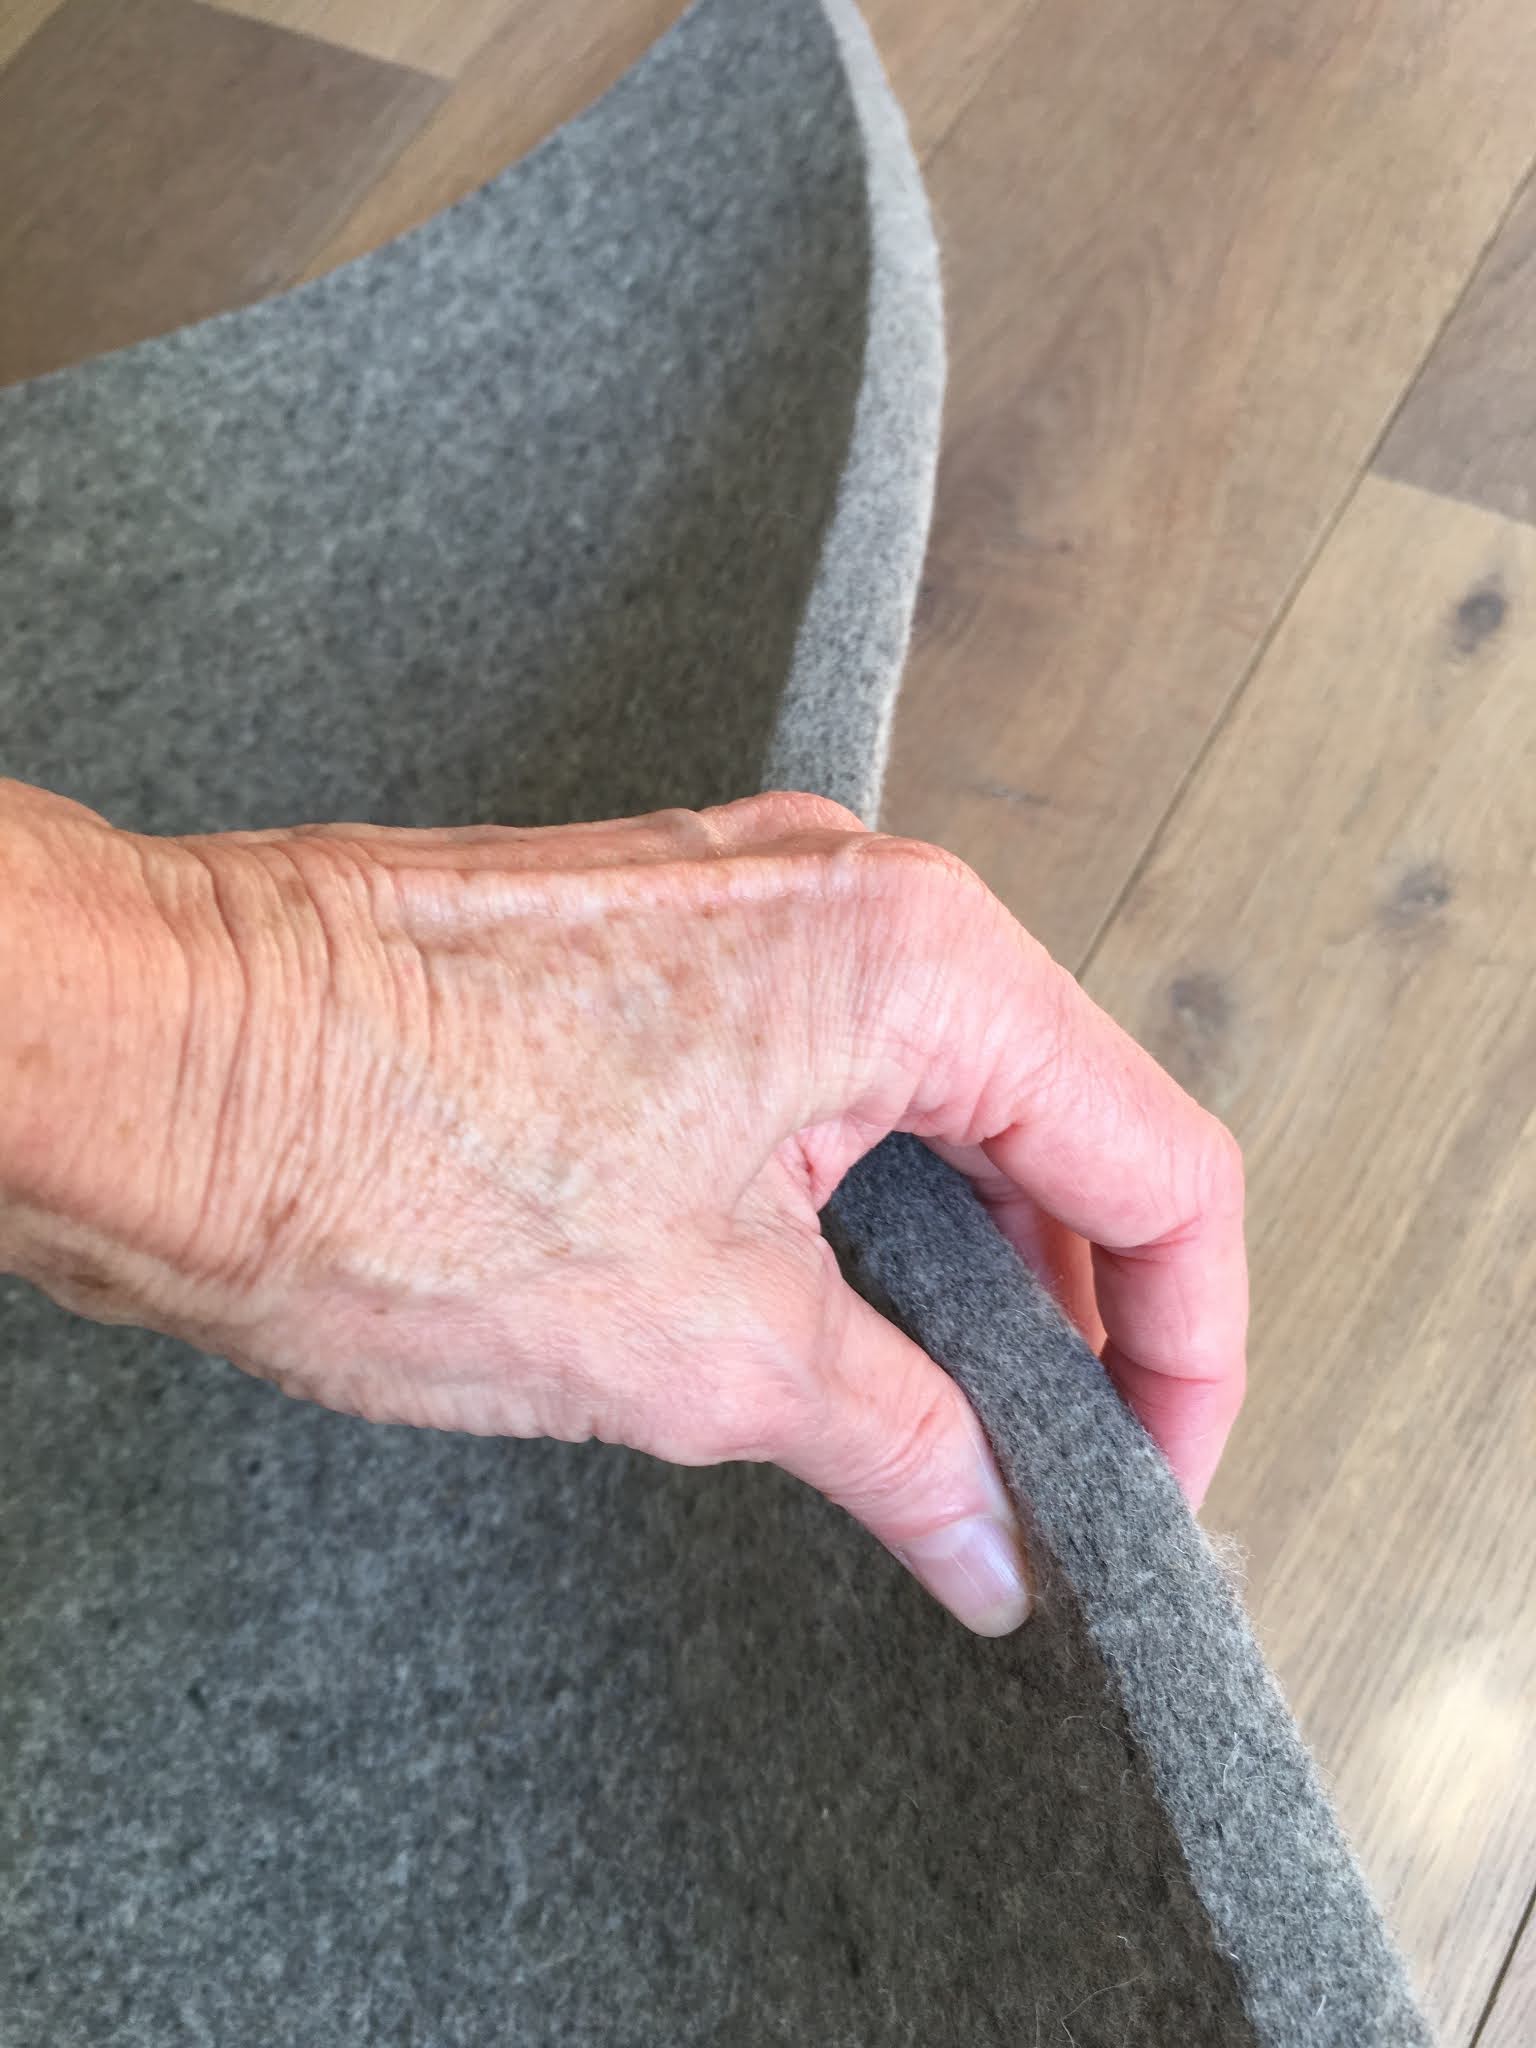
The first thing I wanted to make was an ironing table like the one I have in Michigan.  I can't believe how long it took me to make the first one and now I can't imagine going back to a wobbly folding ironing board.  I did a post about how I made it for Threads Insider.  I'm not sure when they will post it, but it has all the info about how I did it.  I also posted about how I made the first ironing table  Here  The main thing I changed when I made the new one was to get a length of industrial wool felt for the top.  The stuff is 3/4 of an inch thick and OMG does it makes a wonderful ironing pad.  I am in love. 😍


In the picture you can see the iron I brought with me, it has been just fine for years..but...every time I have tried it here it has spit water all over the place!  I hate that!  I have tried all the different types of water, and temperatures, all the iron tricks I know and still water, water everywhere.  Nope, that wasn't going to work.  I just did it!  Got myself a Reliable Professional Steam Station  like I have in Michigan.  Let's call it a Ground Hog's Day present. 😉 Isn't she lovely?!


My ironing table is made with wire pantry shelving and a piece of MDF board.  Since I had to get 6 foot shelves I had some extra supports...and since MDF comes in 4' X 8' sheets, I had a lot of that left!  I used the shelves as 'legs' for a cutting table.  The left over MDF was a generous 6' X 4' and works just perfectly for a cutting table.  I love a "no waste" project.  After much banging and crashing.... Voila! My cutting table!  With lots of shelves for storage.  She's a beaut!


The reason that we had to redo the A/C was that it had been leaking onto the floor.  When we got here we had this lovely staining and a really warm loft!  😟 The holes above the window are from removing the offending appliance, but what to do about the floor?  Other than the stains the floor was fine and sound, so I decided a rug would be the solution for now.  But a rug in a sewing room, hmmm?  How about a vinyl rug?  Thank you Home Depot!  I got a 12' square of sheet vinyl that is soft under my feet and covers the floor until we decide if a new floor is in the cards.


I wasn't sure if I would go whole hog and get a dress form but after the iron incident I decided I may as well get fully equipped...let's call it a Valentine's Day present! 💖😂 And isn't SHE lovely.  All padded out and ready to go to work!


Sooooo.....Welcome to my new southernmost sewing room!!!!!


It seems like a long time coming...I have been imagining the space for almost a year and to finally have it ready for a project...Yikes!  The paralysis of the empty page!  I may just sit and soak up the vibes for a bit before I dive into the maiden sew.